
Easy, free DIY wall art
I’m still neck-deep in Phase I of the master bathroom makeover, but I did take a little molding break yesterday to create some easy, free DIY art for the space.
I’m extra tickled about this particular project because it cost me $0!
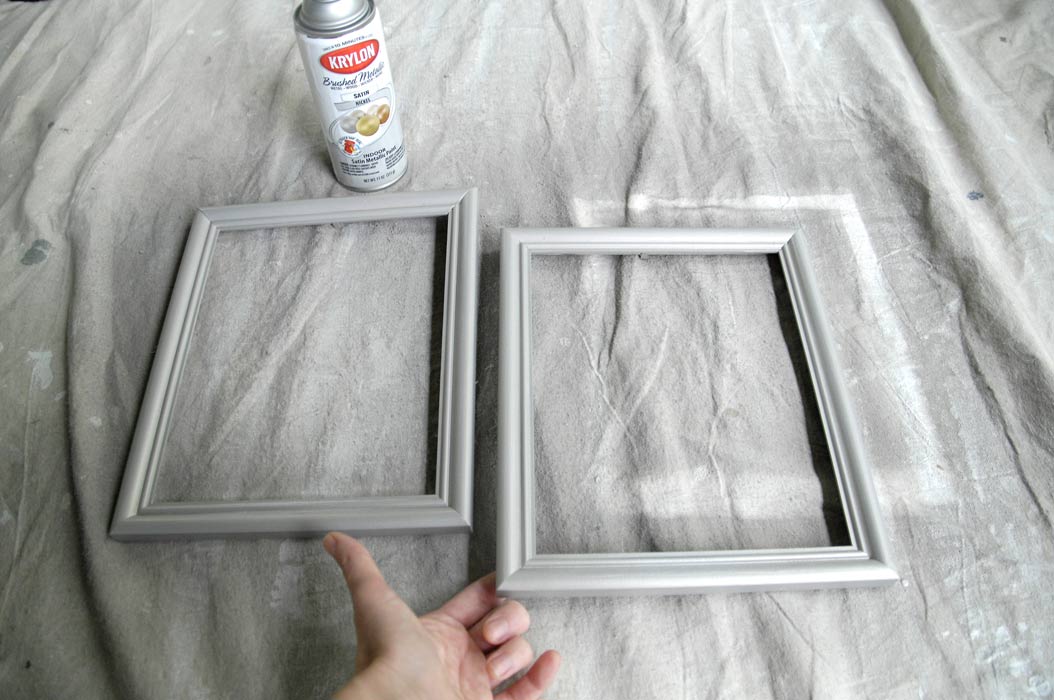
I started with these cheap-o 8×10″ frames I found in my basement.

I primed them white (the only primer I have left on hand at my house), then spray-painted them with Krylon indoor satin metallic paint (nickel finish). This can of paint also happened to be found in my basement. (Who knew my basement held such a treasure trove of DIY goodies?)
 Painting tip: Immediately after painting an object that is lying on a drop cloth, I always try to gently pick it up from the bottom and shift it. This keeps the piece from sticking to the cloth after it dries and creating nasty little nubbies on the edges when you peel it off the cloth. (Yes, “nasty nubbies” is the technical term. ;))
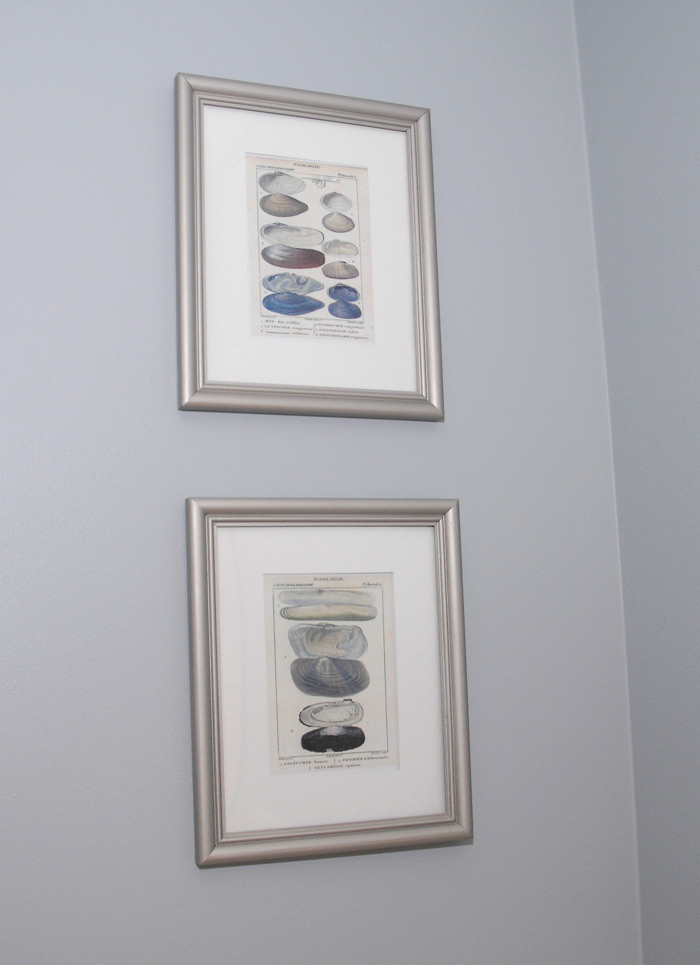
I filled the newly spray-painted frames with matting that, yep, I found in my basement and free “instant art” I printed out on glossy paper.
Matting tip: When I don’t have real cardboard mats on hand, I have been known to paint the frame’s cardboard backing piece white and slap the art in the middle over it. I call this “poor man’s matting.”

I got the art for this project from Karen, aka The Graphics Fairy. I met Karen at Haven this year. You MUST check out her site. She’s got free art galore! I chose two beautiful (and totally free) seashells prints. The colors were perfect for my bathroom.
Here’s my easy, free DIY art displayed in the bathroom:

 Spoiler alert: Next week you’re gonna have to stick a fork in me because I will be done with Phase 1 of the master bathroom makeover. And, more importantly, I’ll be sharing some molding tips (plus what not to do – ask me how I know) and the pièce de résistance of the room. You won’t want to miss it!
I’m linking this up to Fluster Buster, Obsessive and Creative and Fireflies and Jellybeans.


Susan ,
You had me at free!!! Speaking my language.
Beautiful and elegant. Love it!
Lovely, Madame, lovely. Thanks for the freeby art website and the “nubbie” 4-1-1!
Someone’s got to save the world from being overrun by nubbies! 😉
Poor man’s matting…sounds like something I need. Great art results.
Awesome!
Beautiful! Amazing how something that is free can look so expensive.
A-Mazing! Looks fresh and very beachy. Thanks for the wall art web site and all the how-to tips. Blessings! Have a Safe and Relaxing Labor Day Weekend.
Looks so fresh and airy, and I love the repurposed materials!
Thanks, Robin!
So pretty! Love the Nickel finish paint on the frames.
Thanks, Judy!
I saw a tip on Pinterest about keeping your project from sticking to the surface you are painting on. It’s so simple…just stick pushpins in the back of your frame and it holds it off the surface enough to not stick!
What a great tip. Thanks, Cathy!
What would we all do without Karen? 😉 Looks great and I love the stripes in the bathroom! Thanks for sharing! Stop by my Friday’s Five Features and link up this post (and others)! http://diy-vintage-chic.blogspot.com/2013/09/fridays-five-features-no-7.html