
How to create a driftwood finish
Perhaps you’ll recall I was recently given a swift kick in the pants by my favorite DIY-friendly clothing company, Duluth Trading Co. They have a fun contest going on right now where 10 luckies will each win $200 in clothing and a $200 Visa gift card to help them quit procrastinating and finish those put-off projects. If you haven’t already, hurry over to the Duluth Trading Co. Facebook page here for all the details and to enter to win.

Here, I’m unloading the wood for my DIY driftwood mirror frame in my Duluth Trading Co. Armachillo Plaid Shirt and DuluthFlex Slim-Fit Jeans. These jeans are my favorite pair!
The DIY driftwood mirror frame is one of the first items I’m tackling as part of my “kick in the pants” project, which is to finally finish the master bathroom renovation.

I already have an old mirror in my basement that I’ll be using above the vanity. My plan is to hang and frame it myself.
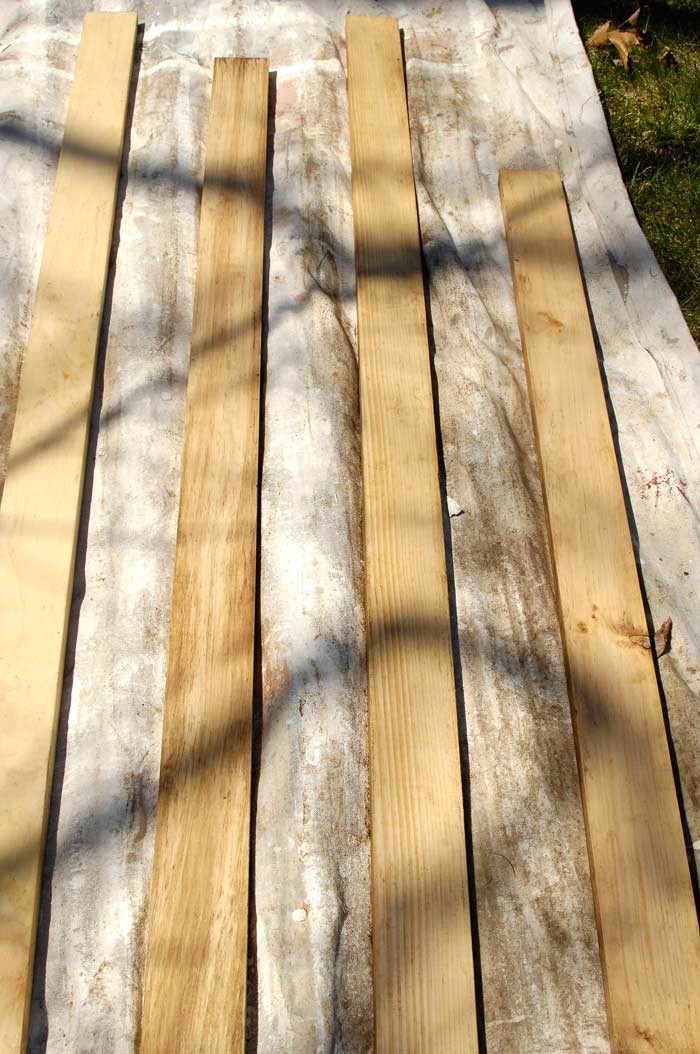
I started this project by purchasing four, unfinished six-foot pine boards from Lowe’s to use for the frame. I love the driftwood finish that is so popular right now. My goal was to try to replicate that look.
After doing some research, I decided to use the steel wool/vinegar method. I got the instructions from this very helpful site.
I laid out my unfinished pine boards. Then I took steel wool that had soaked in vinegar for 24 hours (letting it soak longer will yield darker results) and wiped each board down thoroughly with the concoction.

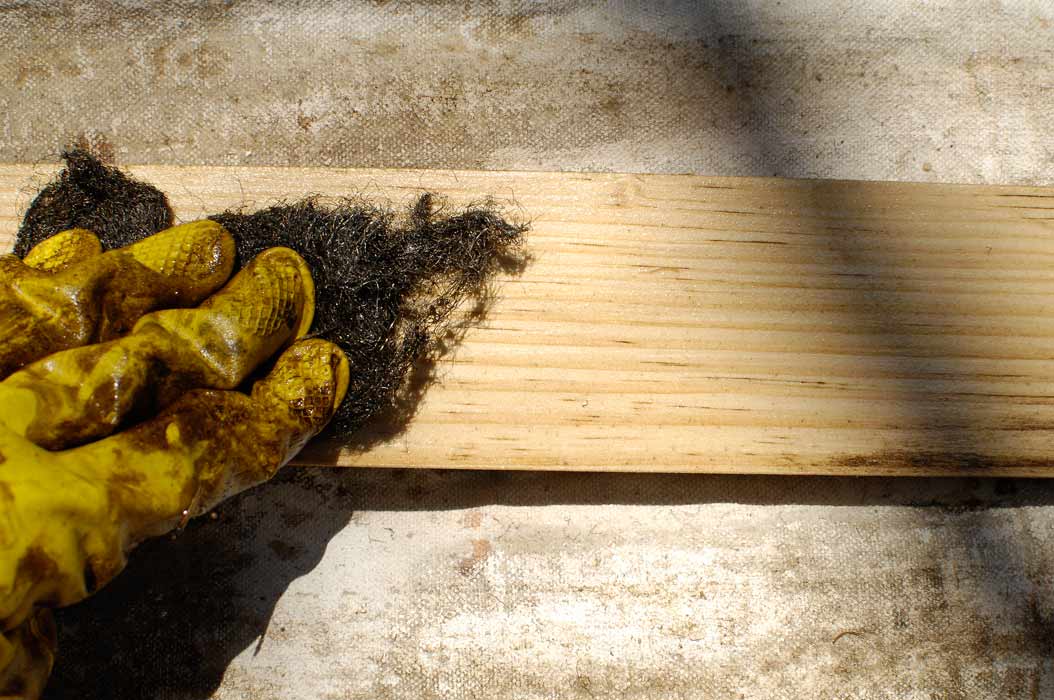
This technique brings out the grain of the wood and gives it a slightly weathered look. Different types of wood will perform differently. Oak, for example, may respond more intensely to the mixture.
Here’s a peek at the boards after the steel wool and vinegar were applied.
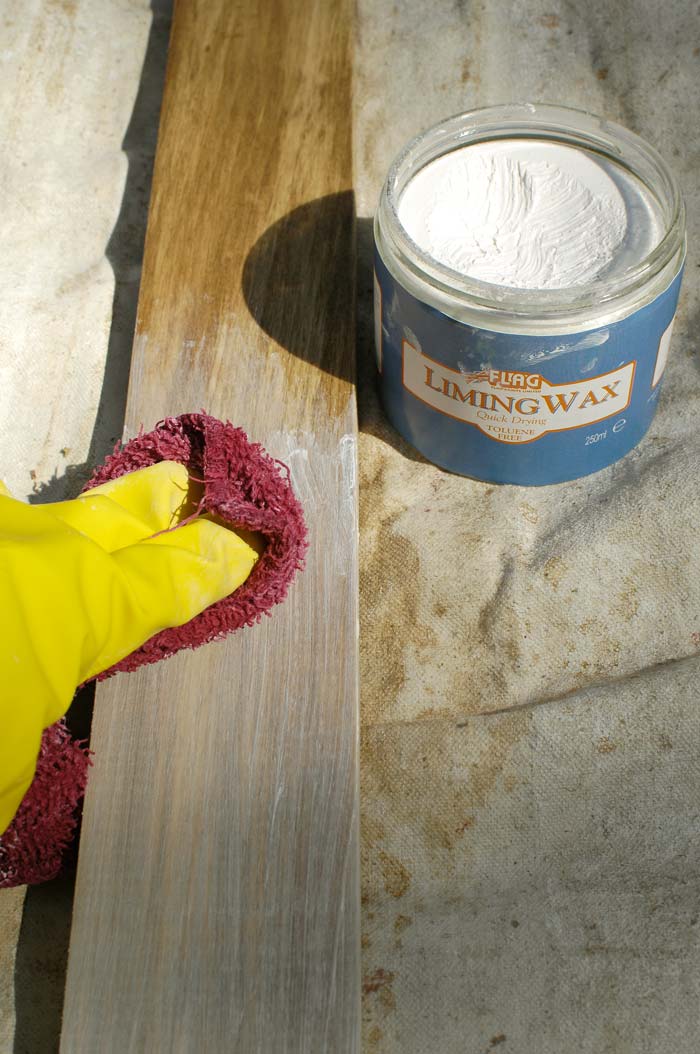
After the boards dried, I applied two layers of liming wax. This is the first time I’ve ever used this product and I absolutely love it. I purchased the wax through eBay. I wasn’t able to find it in any local stores.
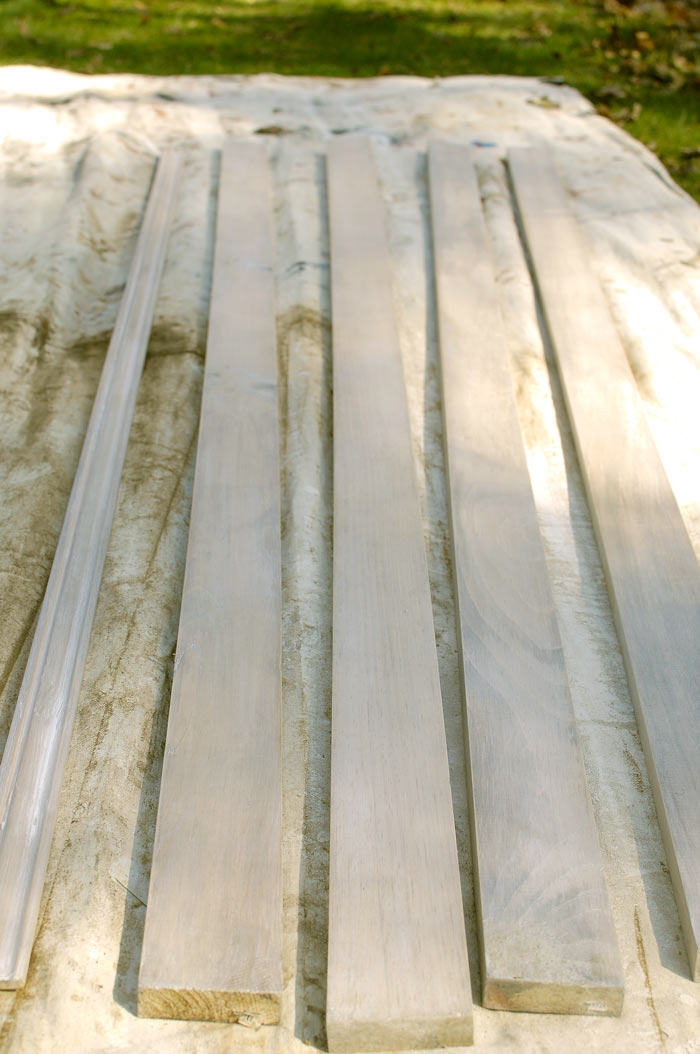
I was really impressed with the resulting color. It was exactly the look I was going for. After the wax dries, all you need to do is buff the finish with a soft cloth and you’re done. Now I just need to mount the mirror and attach the frame. Stay tuned for details coming soon.
Do you have a DIY project you need a kick in the pants to finish? Be sure to enter Duluth’s contest here.
![#004: How to beat procrastination and become a finisher [Podcast]](https://livingrichonless.com/wp-content/themes/hueman/assets/front/img/thumb-medium-empty.png)


I’d love to see the bathroom Completion! The affect on the wood looks great.
Thanks for stopping by, Kristin. I’m hoping to finish everything within the next few weeks!
I want to do this to a dinning table that we built. I have to sand down the edges and the rest of the table to make it soft. My question is will the wax still adhere correctly. Maybe this is a stupid question but I just want to make sure. (:
If I’m understanding correctly, you’re saying you need to sand the table down first to make the finish smooth and ready to accept paint and a topcoat? If so, then yes. The chalky finish paint will adhere well to that well-prepped surface. If you’ve got the time, give the paint a day to dry and then apply a wax to seal it. Or you could top the painted piece off with a coat of satin polyurethane or simply a paste wax to protect it, too. I used what I had on had, which was the clear creme wax.
What is the color you use for the liming wax please?
It’s just a plain white paste. I think that’s the normal color of liming wax.