
Master closet renovation: Done!
I am happy to report that the hubs’ master closet is finished. If you remember, we began this DIY closet project with a hot mess of a space that was not functioning well. In fact, at one point last year, we even stole a shelf (or two) from the mister’s closet so we could complete the little man’s closet, which then left my husband with, um, zero shelves and rods in his own closet. Here’s a reminder of what the project looked like when we were in the thick of things:

We basically designed the (new) closet from scratch. Our goal was to make it uber-functional yet budget-friendly, which meant we would be DIYing as much as possible and working to keep the grand total under $200.
 Here’s the final result:
 We decided against the additional long hanging space you see noted in the drawing and opted for more shelves instead. We also decided to forego window treatments for the time being.

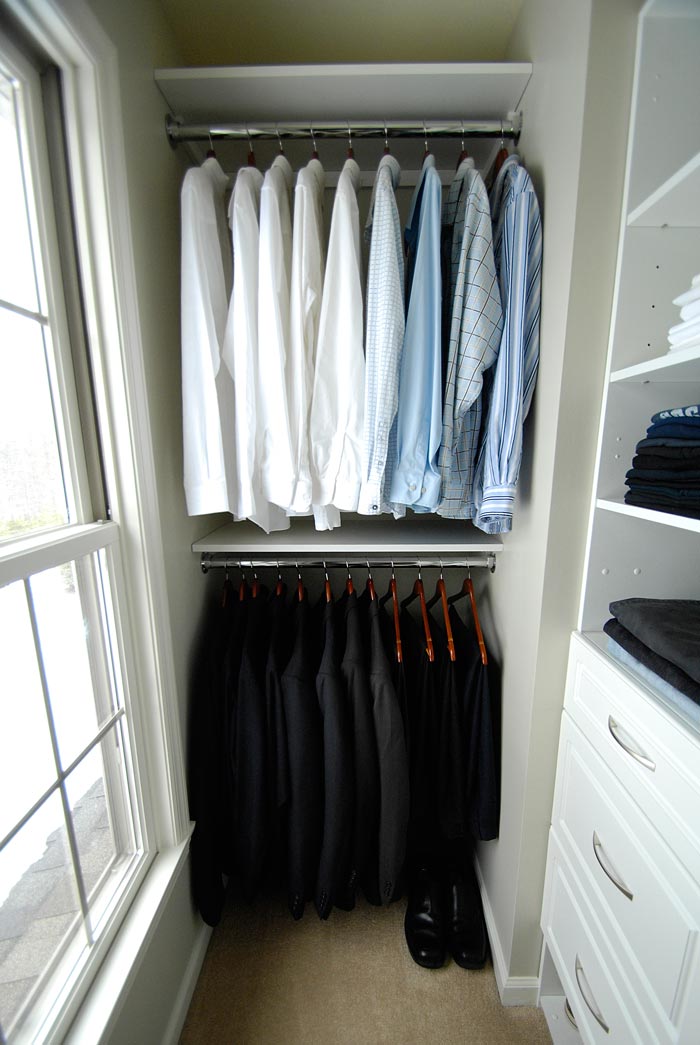


We built all the shelves ourselves using melamine-covered boards and furring strips (where necessary). If you haven’t been following this project from the beginning, be sure to check out our video on how to build shelves to fit perfectly when walls are out of square:
Here’s the cost breakdown of the whole project (all materials were purchased at Lowes):
- 2 – closet rods = $17.08
- 2 – 3/4″ melamine shelves = $18.82
- 2 – closet rod holders = $7.26
- 5 – 5/8″ melamine shelves = $61.20
- Shelf clips = $3.30
- Light fixture = $28.46
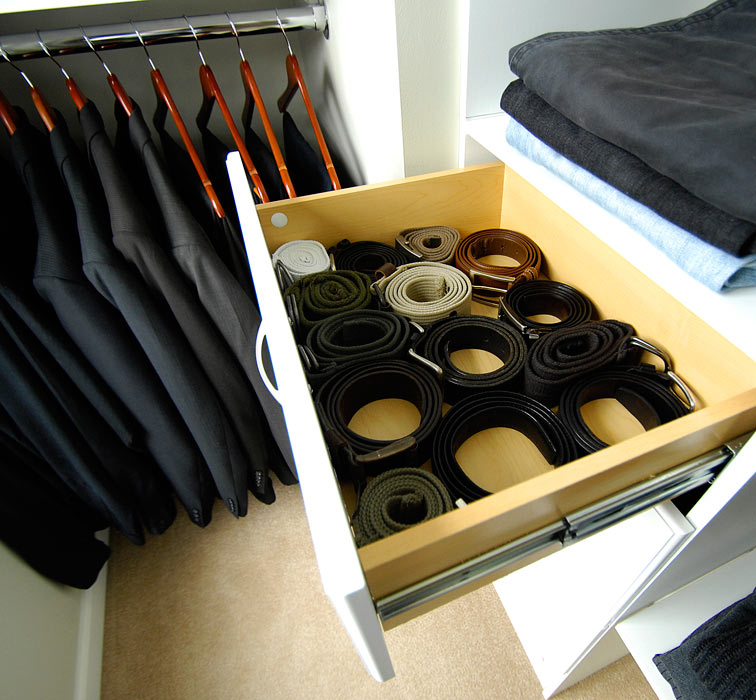
- Drawer/shelf unit = $99.99
- Paint – used leftover from office reno = Free
The grand total came to $236.11. While we went slightly over our budget goal, I am still thrilled with the results. For all the details of this project, including the reason we added pre-made drawers instead of building our own (best decision ever), click here and here. And don’t forget to check out my tips for creating a magazine-worthy closet.
What do you think of the final result?
I’m linking this up to Beneath My Heart, House of Rose, Home Stories A to Z, New Nostalgia and DIY by Design.


Wonderful work there, Susan! Looks amazing!
Thanks, Robin. BTW, I don’t want you to think I just snatched up a copy of your book with no intentions of reviewing it on my site. I’m actually finishing up the very last chapter of my own e-book this weekend (whew!), so I’ve been under the gun with that project. But I will get to it, pinky promise!
Rest assured, I had no such thoughts! (I can imagine how busy you are!) Keep me posted about your eBook, too — so exciting!
Love the end results! It looks co clean and organized! Great job!
Y’all outdid yourselves, Susan. The closet looks UH-MAAAZING! I’m so impressed and proud of you.
On another note, I saw the comments above about your e-book. Wow, girl! I can’t wait to see it. Congratulations!!
Thanks, Sharon.
You may want to rethink not putting up some type of covering for the window in the closet. In the past, I had a huge closet with a window. I found that the sun bleached some of my favorite pieces. I will never have a window in a closet again unless I provide some type of sun protection. Otherwise, your closet is absolutely delightful. I wish my current closet was as clean and well organized as yours.
No kidding. Thanks for the tip, Louise. We were thinking of maybe eventually adding a light-filtering white blind. Still contemplating …
I just subscribed to your blog. I absolutely love your carpentry tutorials. I am slowly redoing my 20 year old home and really appreciate your advice!
Thanks so much for stopping by, Mary. I’m glad the tutorials have been helpful. I’m hoping to do a lot more in the near future, so stay tuned. A 20-year-old home sounds like a good age … not too old yet to have major structural or wiring/plumbing problems, right? (Crossing fingers.) Good luck with your renovation projects!
Oh the closet just came out beautifully! I love all of the light that the window brings into the space and the layout looks perfect! Great job!
Awesome job!!!! I love the jar of golf balls! I like the shelving and think you’ll be happier you did that instead of the hanging space!!
Kate @ Uniquely Undone
Dirty secret … as I was putting in the golf balls, a huge piece of glass broke off the bowl. I spun it around so you can’t see it in the photo. 😉 Lesson: Be VERY careful when putting golf balls in a GLASS container. Thanks for stopping by.
I signed up for your emails but I haven’t received the ebook
Tammy, you should have received a welcome email message from me with a link to the book in the message. If you did not, you may want to check your email’s spam folder, as it may have inadvertently landed there. If you still cannot locate it, please let me know and I’ll send you a direct link to the book. Thanks for subscribing.
You did such a great job. I will be featuring it tonight at my Swing into Spring party that opens at 8pm EST. Please stop by and pick up an I’ve Been Featured button. Thanks.
This looks amazing. What are the Dimensions of the room?