Tips for canning tomatoes
Over the weekend, I spent some time canning tomatoes. Those of you who preserve food this way can relate to the fact that, when you are canning, everything else gets pushed aside. You’ve got to strike when the produce is ripe. And canning is a task that requires your undivided attention for hours at a time.
I always start with the freshest garden tomatoes. Overly ripe tomatoes will produce mushy, watery canned tomatoes.
 Before I started working with my tomatoes, I made sure my jars, bands and lids were clean and sanitized.
I loaded already washed jars and bands into my dishwasher (alone and without detergent) and chose the hot wash and sanitize options on my dishwasher. Traditional sterilization methods call for immersion in simmering water. For directions on how to properly do that, click here.
I did immerse the NEW lids (NEVER attempt to reuse lids) in simmering water to sterilize them.
 When my jars, bands and lids were ready, I began working on the tomatoes.
First I washed and blanched them. Blanching is the process of cooking something briefly in boiling water (about 60 seconds) and then transferring it to an ice water bath, which causes the skin to loosen so it can be easily removed.
After I removed the tomato skins, I cut out the cores and halved or quartered the tomatoes (based on size).
Then I hot-packed them in jars and processed them. For specific instructions on hot and cold-packing and processing methods for tomatoes, click here.
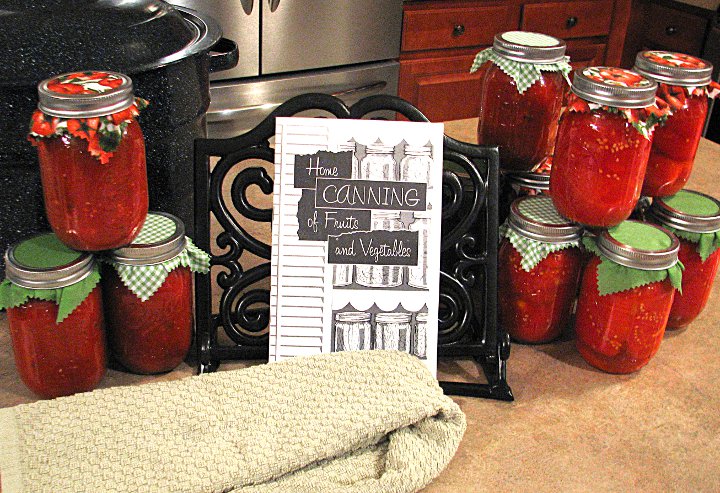
 When I was done, I had 17 pints of freshly preserved tomatoes. Here is a closeup of our delectable tomatoes.
 There are many great online resources for canning fruits and vegetables. But I like to use these booklets. My mom gave them to me years ago.
 If you’d like to try canning (be prepared; it is long, hot work), you can download the U.S. Department of Agriculture’s guide to home canning here.
By the way, you can make those cute, fabric jar covers by taking any scrap fabric you have lying around the house and trimming it into squares (or circles) using pinking shears. For wide-mouth jars, you’ll need at least 7-inch squares (or circles) of fabric. For small-mouth jars, you’ll need at least 6-inch squares (or circles).
There is no doubt. Canning food is tedious work. But I also think it is so neat because it brings families together; it connects us to our past (i.e. it gives us a “taste” of what domestic chores used to be like before we could just buy stuff off the supermarket shelves); and it gives us the satisfaction of providing delicious, healthy, artificial preservative-free food for our families.
Do you enjoy preserving your own food? Do you have any tricks or tips to share with those of us who are new to canning?
I’m linking this up to Tutorials and Tips Tuesday.


I used to can tomatoes, but now I freeze them. To me it is easier; you just have to have room in the freezer. Made freezer slaw today….it is that time of year.
Can you share how you freeze them?
Thanks for the great canning tutorial! I used to love watching my Grandma can, but I never really learned to do it.
Your tutorial will help ensure that this does not become a “lost art”.
Thanks, Jeannie. It is a great past-time.
It’s so nice to see other people who feel the same way about canning as I do. My Grammy canned everything and anything it seemed. I still remember going down to the basement and seeing nothing but shelf after shelf of jarred goodies. My husband and I plant a garden every year and can everything! I too believe this is becoming a lost art in my opinion.
It is hard work — I have not perfected it yet. I would like to know other ways to preserve besides canning. The fabric tops are lovely!