
How to build sturdy shelves for heavy stuff (plus tips for working with volunteers)
Before Thanksgiving, I shared a bit about a DIY project our church’s praise and worship team was working on. We attempted to tackle a total renovation of the small room next to our sanctuary that houses all of our extra music equipment, particularly the traveling sound system we use when we minister to folks in our community.
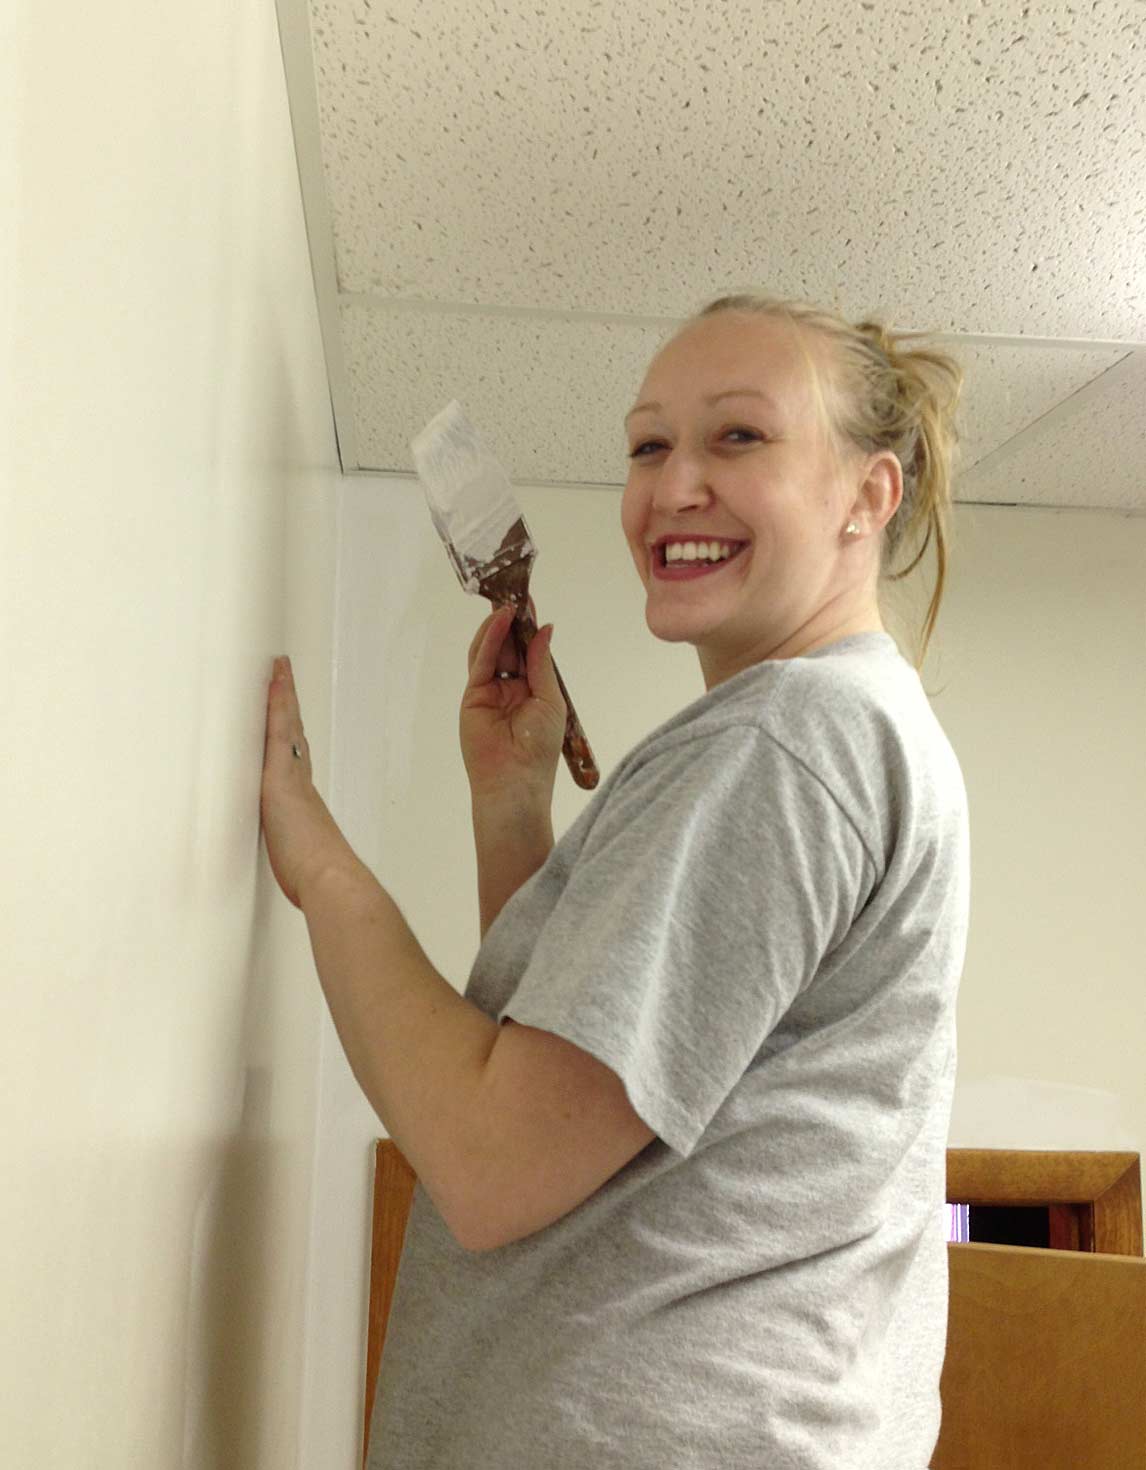
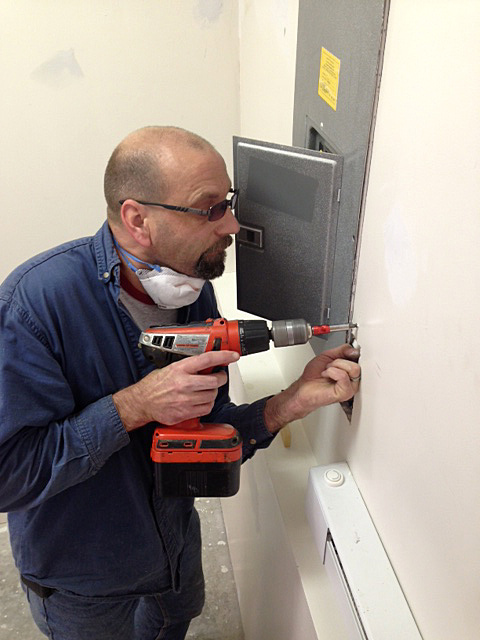
On that epic DIY Saturday in November, our team was armed and ready to trade the guitars and microphones for paint brushes and power tools. 😉

From left to right are vocalists Megan (my sis) and Cindy; Rick, our sound technician; and his wife Michelle, one of our guitarists.
We got a ton finished that day, including re-painting the entire front of the sanctuary and the music room and building a set of shelves for the equipment. Our bodies were tired but our spirits were refreshed. 🙂
It still took about a month of Sundays after that for us to get the bulk of the job done and to put the finishing touches on the shelves. But it was totally worth the time investment because we now have a functional music room complete with pretty shelves that can hold some HEAVY stuff.

I wanted to share how these shelves were built because it required a beefier method to ensure they would hold up under the weight of our equipment.
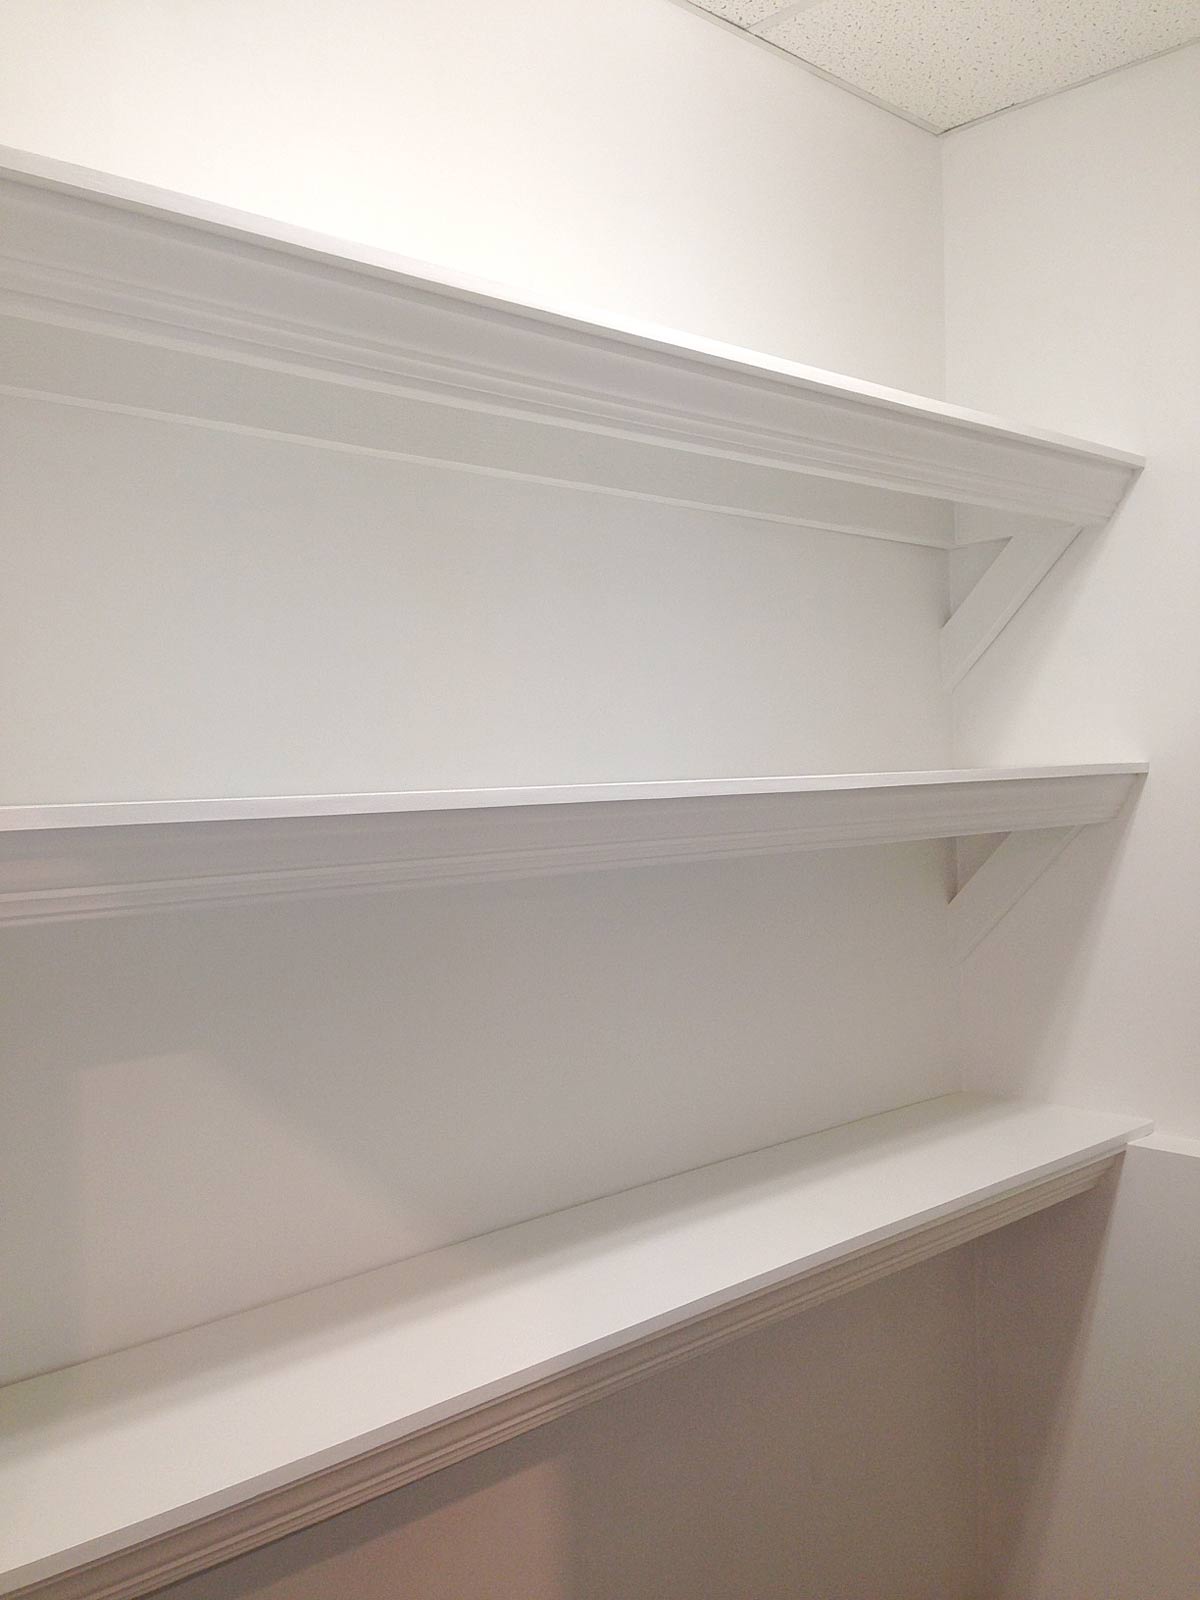
We started by screwing primed 2×4 furring strips to the back and sides of the wall (in studs) and across the front, which served as bases for our three shelves.


Since there weren’t studs available in the side walls to screw our furring strips into, we cut corner braces out of 2x4s to reinforce them.

We ripped our shelves out of a sheet of 3/4″ plywood. We were able to get three shelves out of one sheet, which meant each shelf was 8 feet long and about 16″ deep. We primed and painted the plywood shelves before we set them on their bases and attached them to the furring strips.

The front of the plywood shelves overhung the 2×4 bases by about 5 inches. Then we installed crown molding on the front of the shelves to hide the not-so-pretty 2x4s.

And to hide the edges of the plywood, I ironed on some veneer edging, then painted it to match the shelves.

Finally, we patched, sanded, primed and painted over all our mistakes. 😉 And now we’ve got sturdy (and pretty) shelves to hold all the music equipment.

After all the stuff gets organized and loaded back into the room, I’ll try to share some pictures so you can see how the space is working for us.
In the meantime, I wanted to take a moment to thank all of the amazing people who volunteered their time, money and materials to make this project possible, including the praise and worship peeps and others from the church …

… the generous folks from Sherwin Williams, who supplied us with paint, primer and painting supplies; and the folks from 3M™ who gave us Patch plus primer (boy did we go through a lot of that ;)) as well as paint/sanding respirators and ScotchBlue™ painters tape.
I also wanted to share a few tips for working with volunteers for those of you interested in organizing a project like this.
Tips for organizing a DIY project involving volunteer labor
- Extensively plan out the details and steps of your project in advance. Consider how you will organize your volunteers to make sure everyone stays busy and engaged and the work gets done as efficiently as possible.
- Develop a complete materials list and have everything set up, organized and ready to go on the day of the project. Remember to provide all necessary personal protective equipment to your volunteers (safety glasses, masks, gloves, etc.)
- Remember to let your volunteers know what to wear and what to bring with them to the event. Don’t forget to plan for and provide snacks/meal breaks for them.
- Ask your volunteers what portions of the project they feel most comfortable working on and what DIY skills/experience they already possess.
- Explain every part of the project in detail to your volunteers. In your head, the steps may be obvious. But others may not clearly see your vision. Also, be open to suggestions and to change something if necessary.
- Always remain accessible and available to explain details, offer input/suggestions and make decisions. Consider your main role to be “foreman” and be ready to answer lots of questions.
- If possible, use the same paint color for all walls, ceiling and trim/shelves. This will help the project go faster, reduce pressure on inexperienced painters, and yield a more professional-looking result.
- More people equals the potential for more mess. Be sure to lay out plenty of drop cloths and do as much of the project outdoors as possible.
I’m linking this up to the Live, Laugh Linky.


Work well done! It is always rewarding to save money and do it yourselves!!!
My husband is a journeyman carpenter and this is how the shelves in my storage room are built. Minus the moulding. They do stand up well. Well done.
Thanks, Laura!
Susie, this is the greatest sight to see. Everyone working together on that prodject. How very nice. I see you Meagan, Hi honey bunch 🙂 These shelves gave me a few ideas on how to put some up because we have a problem of no studs behind walls, too. Very interesting. Thanks for sharing. Love ya grl
Thanks, Marg. Hope to see you guys soon! Come visit us anytime.
How much weight can the shelves actually hold?
I’m not sure exactly, but I’d estimate we have more than 100 lbs. on one of them with no problem.