
DIY stenciled bee pillow
Here in Pennsylvania, we have been waiting a really long time to see those first signs of spring. Despite the ongoing chill, I decided to whip up a fun spring craft project with the hope that warmer weather is right around the corner.

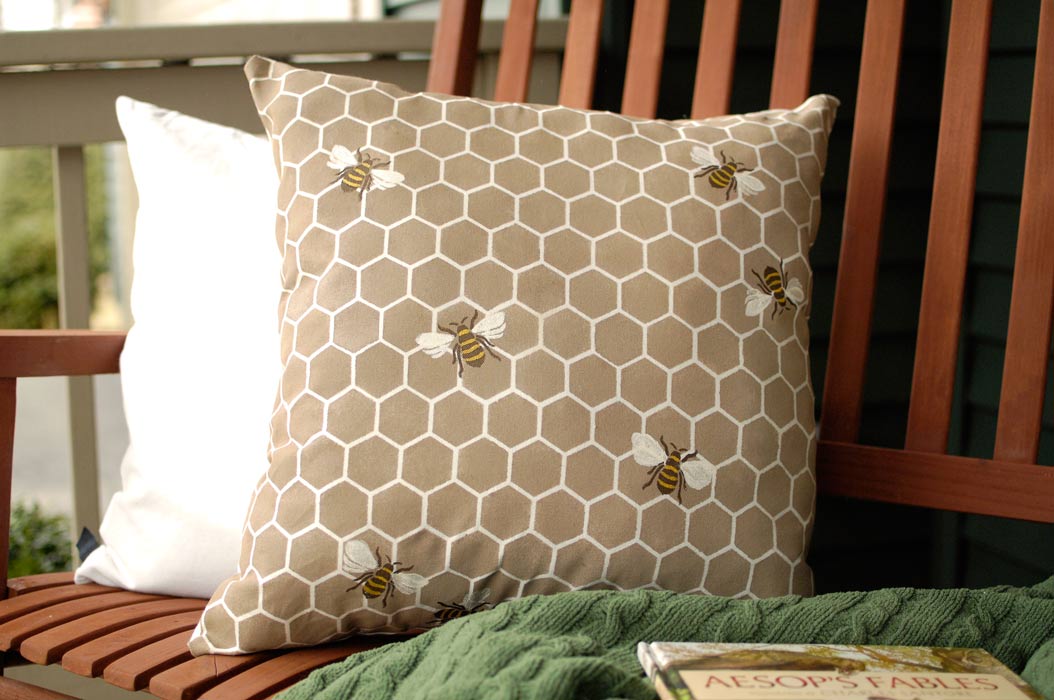
I made this whimsical bee pillow using the Royal Design Studio Beehive Allover Furniture Stencil.
I started with a cream-colored twill curtain I bought from a yard sale a few years back. I paid $1 for a set of four curtains. Other materials I used for this project included: Royal Design Studio stencil cremes in Bronze Age and Pearl Oyster, and a stencil brush; gold-colored acrylic paint for the bees’ bodies; beige-colored acrylic paint for the inside of the honeycomb; and a textile medium (used to help paint properly transfer to fabric).

I cut two 22″ squares out of the curtain, one square for the front of the pillow and one for the back of the pillow.

I mixed up the beige paint and the textile medium (two parts paint to one part medium).

Then I started stenciling the honeycomb pattern onto one of the squares using the honeycomb stencil, stencil brush and paint. For tips on how to get the best results with stencils, check out this post.

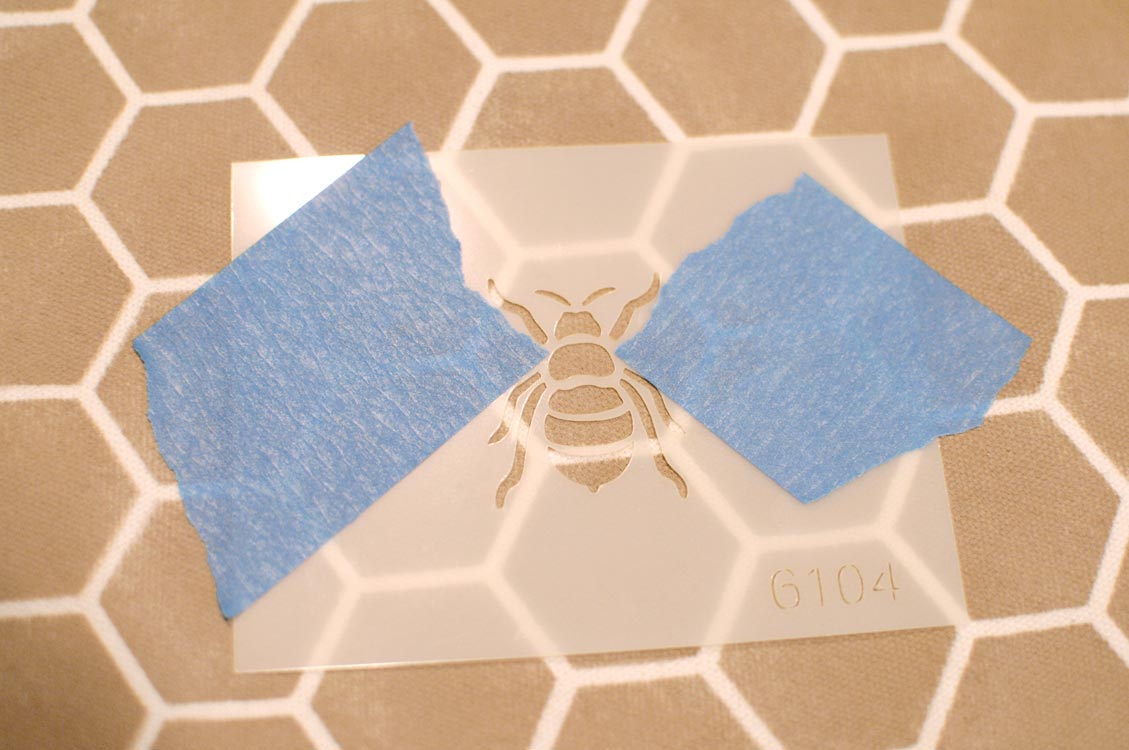
After I stenciled an entire square with the honeycomb pattern and the paint dried, I placed the bee stencil on top and taped off the wings, so I could paint only the bee’s body and legs.
I used the Bronze Age color for the bee’s body, but if I did this project again, I would use a darker color like black.
After I stenciled multiple bees’ bodies on the pillow square, I taped off the bodies and used white paint for the wings. I got a little impatient during this part and a few wings weren’t as crisp-looking as I would have liked. So remember to go slow and offload your brush. Finally, I hand-painted yellow stripes on each bee.
I sewed the pillow together using my half-hour jiffy throw pillow technique.
Here’s the final result:


Have you done any spring craft projects yet?
Disclaimer: At my request, I received the Beehive Allover Furniture Stencil from Royal Design Studio in exchange for showcasing it on my blog. As always, all text, opinions and projects are mine.
I’m linking this up to Home Stories A to Z.


Love it! At first, I thought you stenciled only the bees, not the beehive. I may have to try this!
That is absolutely adorable!! So cute. I’m in NJ waiting for that spring weather too. Thx for sharing 🙂
Thanks for stopping by, Lisa. Warm weather has to come eventually, right? 🙂
So stinking cute! Looovvveee it! We are waiting on the spring weather here in NJ too. Thanks for sharing !!
Love the bees. My BFF uses a bee theme is areas of her home because her last name begins with a “B.” Thanks for the cute idea!
Very nice Susan. Here’s a thought, make another pillow and do the bees in black. However, honeybees are light brown, so it looks good either way. To highlight the room, here’s a “creepy thought”, display a nice “dead beehive” like an old hornet’s nest. The kids would love that and it cold be a conversational piece, at least for awhile until it really creeps you out. LOL. MIssed you today in church.
Donna
This would be great on my front porch. Thanks for sharing.
I LOVE this idea,, how cute is this? and doable too!! I want to try this.. btw: not sure how you sew up your pillows the way you described, lol
So easy, Marg! Just cut out two equal squares. Line them up together, inside out. Then sew a 1/2″ hem all the way around, leaving about 4-5 inches un-sewn. Turn the fabric right side out again, put all the stuffing in the middle, then hand sew the last few inches. Again, the tutorial is here: http://livingrichonless.com/more-office-progress/ 🙂
I just found your stenciled pillow. It is gorgeous? Thanks for sharing.
Glad you like it, Deborah. Thanks for stopping by. 🙂
Oh Sus! This is so adorable! what a fantastic idea for a spring pillow, I’m in love!