
3 tips for hanging pictures and decorating walls
I recently got an interesting question from a reader. She asked for help figuring out how to hang pictures and decorate walls so that they look professionally decorated. I don’t feel super confident answering this question because, frankly, I still have a few empty walls in my own house that I’m not quite sure how to style.
Although I certainly don’t claim to be an expert on this subject, I have picked up a few tricks along the way and have also done some additional research. I’ll share what I know and hopefully it will be helpful to you in some way.
1. Consider height, width and furniture when planning a gallery wall.
If a gallery wall is your goal, it may be a good idea to give your cluster of artwork an anchor, like a console table or settee. The height of the furniture will then determine the display’s dimensions.
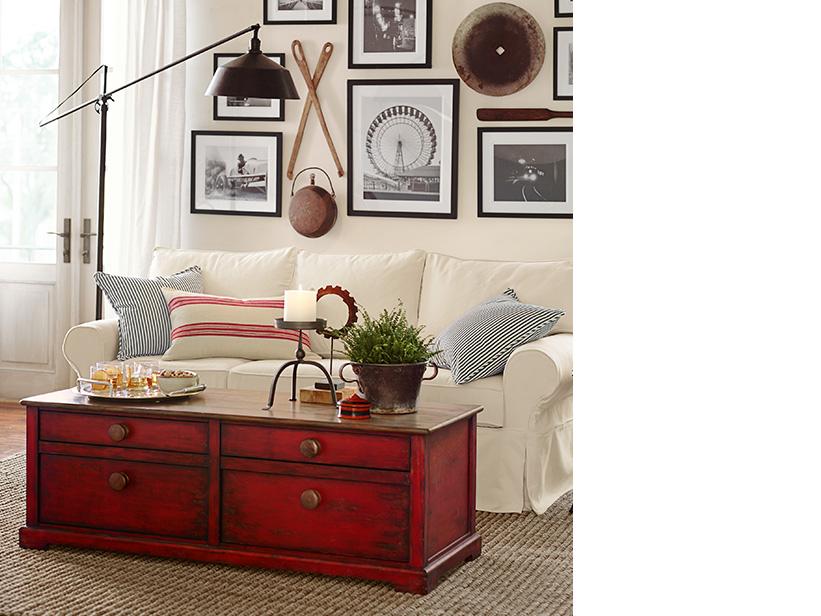
Via Pottery Barn
According to designer Bunny Williams, in general, the top edge of the highest frame should be about seven feet from the floor, and the lowest piece should end five to six inches above the furniture, with the center of the arrangement at eye level. Let the edges of the outermost frames extend three to six inches past the sides of the furniture.
2. Size art appropriately, while adding dimension.
Bunny recommends mixing rectangular and square pieces of art, choosing mainly pieces of similar size. There is an exception, however (which confirms a rule I was taught in graphic design school). You’ll need one piece that’s a third larger than the rest to ground the vignette. It can be centered or off to one side.
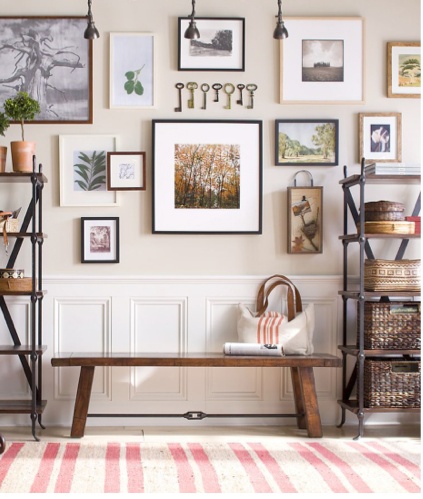
Via Pinterest
To add dimension, use a variety of mediums – such as watercolors, photographs and sketches; mix the scale of the artwork – some close-ups, some environmental perspectives; and vary frame styles and colors, keeping the frame widths comparable.
3. Be aware of the space between.
The more tightly art is grouped together, the bigger its impact, according to Bunny. She says a close-fitting collection can actually look larger than the sum of its parts. It reads like a deliberate, related display rather than a bunch of random pieces. So she recommends leaving just two to three inches between frames.

Via Pottery Barn
Hopefully these three tips will give you a good starting point and some more confidence as you prepare to decorate the next wall in your home. I’ll certainly be taking these “rules” into consideration. A personal tip: If you’re like me and you change your art out frequently, consider using Command™ strips to hang everything, so you avoid punching holes in the walls.
For more visual inspiration, here are links to a few gallery walls I’ve created: office gallery wall, dining room gallery wall.
I have also found the “Gallery wall” category on Pinterest to be quite helpful.
I’m linking this up to Home Stories A to Z and Carrie this Home.


These are great tips Susan! I have a couple gallery walls I’ve put together in my home but I just sort of threw them together. It’s nice to have a couple tips to start from so maybe my next gallery wall will look more professional!
Would you mind to link this and any other posts to our Frugal Crafty Home Blog Hop? We love to see frugal decorating ideas like this!
Hopping on over to link up. Thanks for the reminder and for stopping by, Carrie. 🙂
Nice tips. I found that through attending Home Interiors Parties in the past that the art to hanging one frame side my side with another frame or a sconce/candle decor is the equivalent of two to three fingers. My walls are filled, and I did all my decor with tips from Home Interiors. The same measurement goes with putting a shelf below a frame, and you can always offside the frame from the picture too instead of centering. It gives it a cool look too, and allows you to put candles, greens, and nicknacks on a shelf without covering the framed photo. It is always nice to have a mirror on a wall so people can actually see themselves in the mirror, and the mirror has to be placed on a wall that won’t reflect the sun when it shines in the window. With an offset shelf below or even above a frame (which is also cool), you can use butterflies, humming birds, other birds to decor the off set area, and looks nice. Enjoy your day! Always enjoy your ideas! Ok, now going out to Shovel Snowstorm Rex this afternoon!
these were great tips! Now i just need to incorporate them.
So happy to have the folding a fitted sheet video!
Glad it was helpful and thanks for the feedback, Anna.