
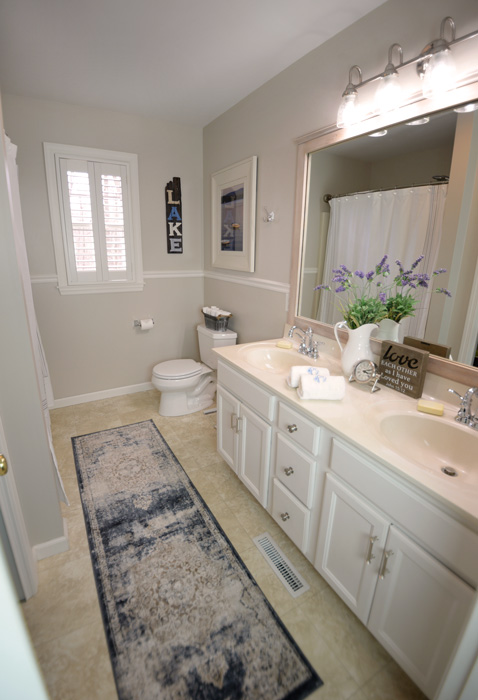
Bathroom vanity makeover (plus how to brush-paint cabinets)
Yep. I’m still working on the master bathroom makeover. And believe me, I would really like to call it D.O.N.E. soon. I only have two more projects to complete before I can walk away from this thrifty makeover. The first one is repainting the bathroom vanity, which I started last week.
All the bathroom cabinets in our house have the same finish. It looks to me like maple with maybe a pecan stain?

I’ve kept this finish in the guest bathroom and downstairs half bath. However, in the master bathroom I wanted a white finish on the cabinetry, so I decided to paint them.
For this project, I used the Rust-Oleum® Cabinet Transformations™Light Kit (in Pure White Glazed).
I started by removing all the cabinet hardware, drawers and drawer fronts before I went to work. Note: This project takes some time. I would estimate it requires about a week of diligent work to complete it.
Step 1: Clean and degloss the surface of the cabinetry.
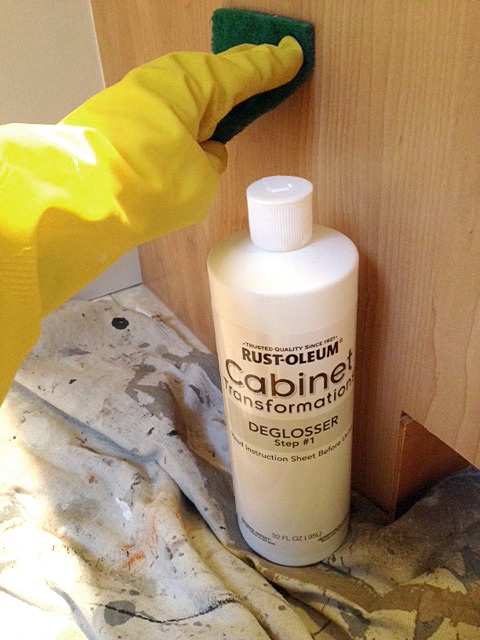 This step is very important as it thoroughly preps the wood to accept the bond coat.
I applied the deglosser using a heavy-duty scrub pad provided in the kit; wiped the surfaces down with a damp cloth; and dried them with a dry, lint-free cloth. Then I let everything dry for at least an hour before I started painting.
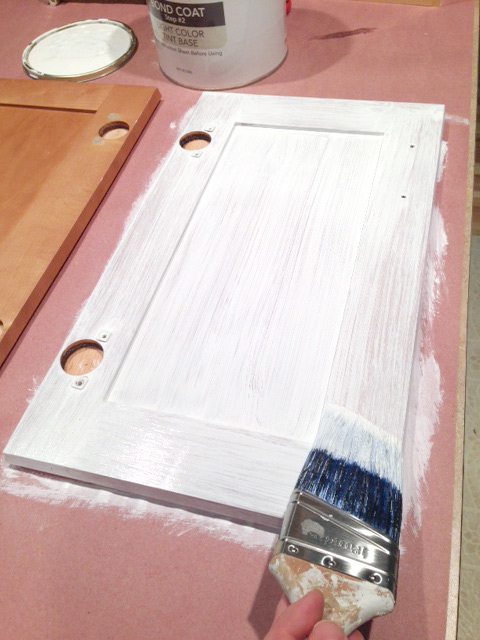
Step 2: Apply bond coat.
I painted the cabinet frame first. Since I was brush-painting everything (I still don’t have a sprayer yet), patience was especially key. I applied a total of three, thin coats of the bonding paint to avoid drips and paint overload. This photo was taken after the first coat:

If you’re brush-painting cabinetry, it is crucial to follow a particular pattern with your brush strokes in order to get a professional-looking finish. The instructions in the Rust-Oleum® product pamphlet explain this in more detail.
For example, with regard to the cabinet frame, I used horizontal brush strokes for the rails, and vertical brush strokes for the stiles and frame sides.

I used the same method for the cabinet doors.

Rust-Oleum® recommends painting the cabinet frames first, then the cabinet doors and drawers, beginning with the backs of the doors. It is also recommended that you use a prop to elevate the doors off the worktable. Or you could position the door you’re painting so that it hangs off the edge of your table and rotate each side as you paint. Just sayin’. 😉
So far, I’ve finished all three coats of paint on the cabinet frame, backs of doors and drawers.

Next I’ll be working on the door fronts and deciding whether or not I’ll apply the decorative glaze before I finish with the topcoat.
Stay tuned for the final reveal coming soon! In the meantime, do you think I should add the decorative glaze or simply finish the cabinetry as is?
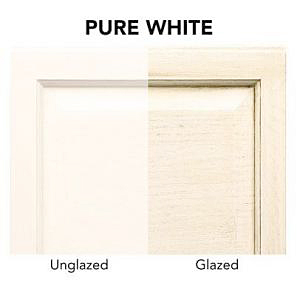 Image from Rust-Oleum®
Special thanks to the folks at Rust-Oleum®, who provided me with a Rust-Oleum® Cabinet Transformations™Light Kit at my request, so I could complete my vanity project and highlight it on my blog.


Very exciting! I vote no glaze. Keep it clean.
I like the unglazed with your trim and the gray/white walls.
Why not glaze the inside of a door and see how you like it? My experience is that you can really vary the final look depending on how much glaze you apply/take off.
It appears that your trim and countertop is more of a creamy white than a stark white so without the glaze the contrast may be too much and end up making the white just look dirty. If you do a test run where it can’t be seen then you’ll be sure.
So how does this system differ from just using de-glosser and regular paint and primer?
Great idea to test the back, Teresa. I’m not sure how much this system differs from regular deglosser, primer and paint. But I suspect the “bond coat” is a little more adhesive, if you will, than regular primer and paint. I’m not sure deglosser alone would work if you’re just using primer and paint. You may have to completely strip the finish first, because regular primer and paint may not be as “sticky.” That’s just my guess.
I like the ‘no glaze’ look but I’m biased as my bath is also powder blue and white – love the clean serenity it gives the space. Eagerly awaiting reveal. My vanity is next since I colored my hair and somehow got dark brown droplets on the front door
I really like the glaze, but I think whatever you decide will be gorgeous. You have done a beautiful job, it looks like a real pro did the work.
Thanks so much, Patty!
Love the glazed!
ungazed would be my choice. However, I wouldn’t have painted it in the first place. I like the maple color. But am sure it will be nice once it is done.
I would leave them white. I am somewhat prejudiced, though, because I just painted a table with light chalk paint, then attempted to use a darker wax. I am not happy at all with the results. I think the white is beautiful now, and you may not be happy with the results after glazing.
I love glaze, but am thinking no glaze in this room….how would it look with your mirror trim?? Either way, you have great taste and I believe the end result will be perfect!
I’m super excited to see the reveal post for this because I have been thinking about using this kit for our kitchen cabinets!
Oooo they both have their charm. Love the sleek and clean no gloss but the character the glass adds is nice too! Looking forward to the finished product! And thanks a million for the tips- looking to tackle some outdated furniture that got donated to us!
This is super late but what brand and color paint are your blue walls?
Never mind. Found it! Sherwin Williams’ Samovar Silver
Yep, that’s it! Thanks for stopping by. 🙂