
Thrift store transformation: DIY cane bench

Hi, everyone! I’m Christy, and I blog at 11 Magnolia Lane. Many thanks to Susan for asking me to guest post today!
While I absolutely love to decorate, I can’t afford to drop a bundle on a lot of expensive pieces. It’s not in our budget, plus, as a military family, our furniture takes a real beating every time we move. Sometimes it seems like the more we paid for an item, the more likely it is to be damaged! I’ve learned my lesson, and the solution is to buy things on Craigslist, at yard sales, and at thrift stores, and give them new life through paint and fabric.
When I found this gorgeous settee at the thrift store, I knew that it had lots of potential, and it definitely fit the budget at $40:

Someone had done a very amateurish reupholstery job on the seat, and since I am an amateur, too, you know that when I say that, it was really bad {you can see my tutorial on reupholstering a loveseat here and here}! They decided to add an extra layer of padding to the seat cushion, which was completely and awkwardly visible through the light-colored fabric they used:

I liked the fabric that I uncovered, but it was horribly stained. I decided to leave it in place and simply cover it with new fabric. The seat was fine without that extra layer of padding–no sags or dips, and it’s quite comfortable.
I used painter’s tape to protect the fabric from the overspray, and gave it two coats of gloss black using my HomeRight FinishMax Pro paint sprayer (love that sprayer!).

Then, I used a faux fur fabric (say that three times fast!) in a dalmation print. {This} is the link to the exact material that I used. The fabric is very stretchy and soft, and inexpensive at just $7.25 per yard. Can’t beat that! I used my handheld staple gun to secure the fabric in place; this didn’t seem to be a big enough (or heavy-duty enough) job for my pneumatic staple gun.

The finishing touch was to add brass nailhead trim. I am a big fan of nailhead trim as “jewelry” for a reupholstery project, and this didn’t disappoint.
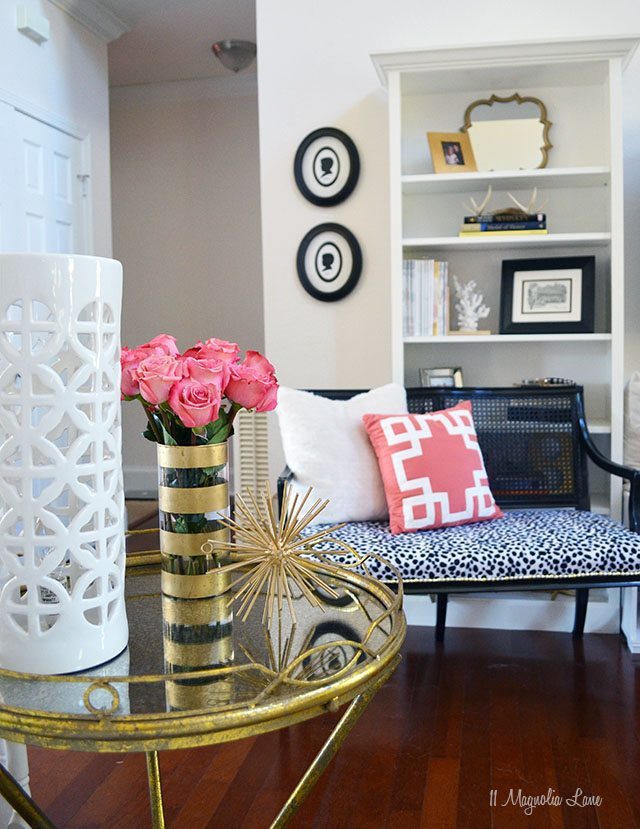
I really love how this project turned out. We always need extra seating, and this fits perfectly with our living room decor.

I will confess that I tried it at the kitchen table, too, and it looked great there, but then I thought that maybe faux fur won’t be very easy to clean if the kids drop food on it. 🙂

Not bad, for about $65 and a few hours’ worth of work!

And since I took the above photos, I’ve found a new spot for this bench in our living room. It’s so light that we often pull it over to the couch when we’re entertaining.
If you’re a beginner when it comes to reupholstery, a bench or chair is a great place to learn the basics, since it’s a fairly straightforward project. I know you’ll love the results!

•••••
Thanks again to Susan for letting me guest post today!
If you enjoyed this project and want to see more of what we do at 11 Magnolia Lane, I’d love it if you’d follow us via social media (just click on the black buttons below my photo) so we can keep in touch.
Thanks for stopping by!


Just wanted to say thanks for a wonderful site; discovered your site and I know it will be very helpful to me.