
DIY fabric pumpkins (plus a giveaway winner)
Before the Christmas train officially leaves the station next week, I thought I’d share a quick tutorial on the fabric pumpkins I made a few days ago to go along with my Thanksgiving decor.
I started with an extra napkin I had left over from the one-hour napkin curtains I made a few years back. You don’t have to use a napkin for this project; you can use just about any piece of scrap fabric you might have lying around.
I also grabbed a handful of polyester fiberfill that I stole from an old pillow in the basement.

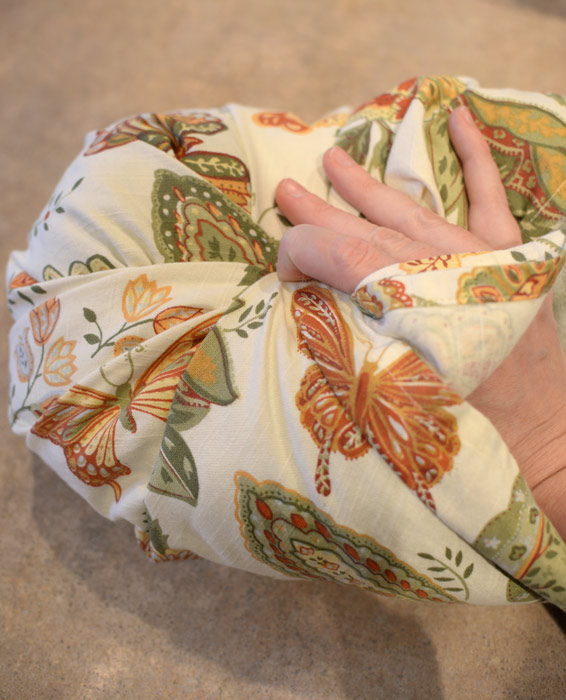
I laid out the napkin, good-side down, and put a ball of fiberfill in the center. Starting at one corner, I began wrapping the fabric over the fiberfill, creating folds as I went along.
 At the halfway point, I hand-stitched the top to secure the folds I’d created so far.
 Next, I took a limb from the backyard and trimmed off a small piece to serve as my pumpkin “stem.”

I jammed the stick in the open hole at the top of the pumpkin, then continued folding and stitching the fabric together around it.

To hide the wonky-looking stitches at the top, I took a piece of burlap garland, folded it in half, cut a small hole in the center, and fit it over the stem.

Finally, I ruched (just a fancy word for bunching up) 😉 the burlap by pulling a bit of twine, threaded through a fat needle, through the length of the garland.

Done!

I made a second pumpkin out of some scrap fabric so I could display a pair of them on the rocking chair on our front porch.
To prevent my pumpkins from getting weather-damaged, I sprayed them with a coat of NeverWet®.
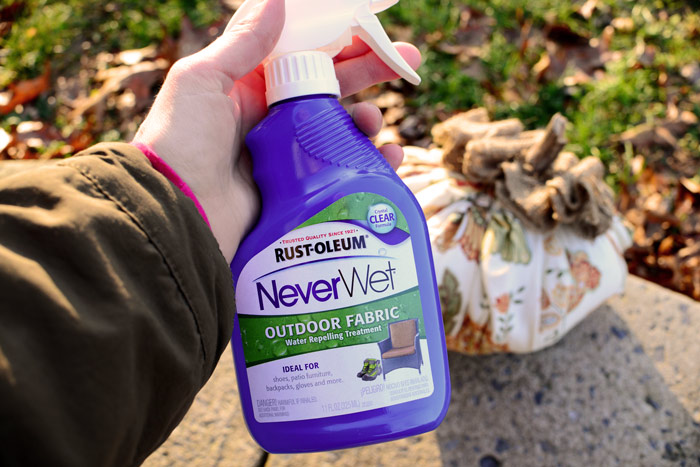 This product repels liquid, keeping surfaces dry and clean. I love this stuff because it dries clear without any noticeable finish, and essentially turns my “indoor” fabric into “outdoor” fabric.
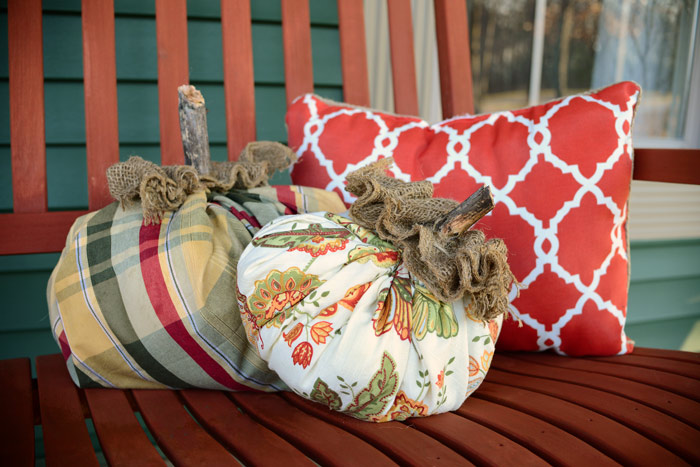 What do you think of my makeshift Thanksgiving pumpkins?
Special thanks to Rust-Oleum® for providing, at my request, the NeverWet I needed to complete this pumpkin project.
Now before I say, “Sayonara,” I wanted to announce the winners of the Xcluder Rodent and Pest Barrier Kit:


Very cute! I have an even easier way (in my opinion anyway) to share — take a roll of toilet paper, wrap some batting around it, wrap with fabric – tucking ends into the toilet paper roll, add a stem (I use twigs or cinnamon sticks) and you are done. Quick & easy – my kind of craft 🙂
Such a fast and adorable project. I really like these pumpkins. Thanks for the tip on Never wet product.
I like this craft too and particularly the burlap finish. I will have to try this craft as well. Good job!