
Flip house kitchen pics (plus a buyer!)
Hello friends! I realize it has been quite awhile since I’ve posted. I began this summer trying to juggle several balls in the air, then quickly became buried in what I’d compare to a McDonald’s Playland ball pit. I’m sure you can relate.
I believe ridiculously busy times in our lives like these are actually blessings in disguise, because they force us to prioritize what is really important. Am I right?
Anyway, dare I say that life is calming down a bit for me right now, and I can return to blogging more regularly again. Yay!
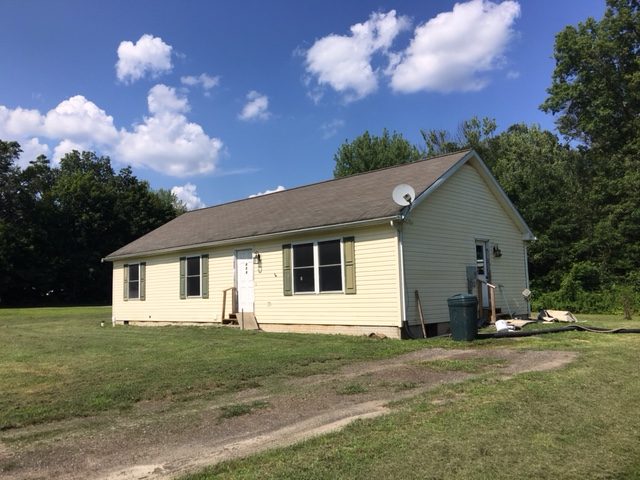
Today I am pumped to share the final reveal of the flip house kitchen with you. Later this week, I’ll be posting a complete recap of the flip house with all the befores and afters, so you can really grasp the magnitude of the transformation.
The best part of this whole endeavor was that, within five days of putting the house on the market, we had a buyer! We’re set to close this week. I won’t make much money on this project (to stick with a McDonald’s analogy, I could have made more flipping burgers). But the experience was priceless and will hopefully serve me well as I go on to tackle the next great project.
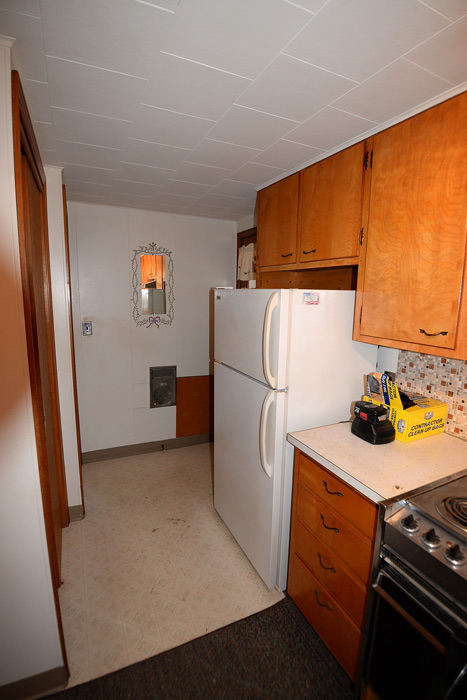
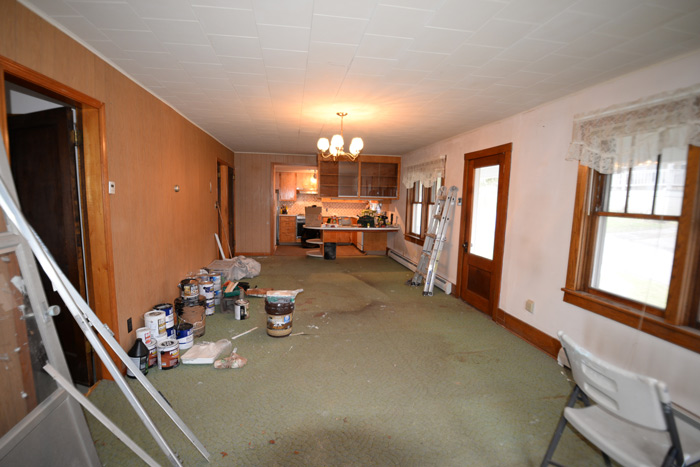
Now back to that kitchen … below is what we started with:
Kitchen before
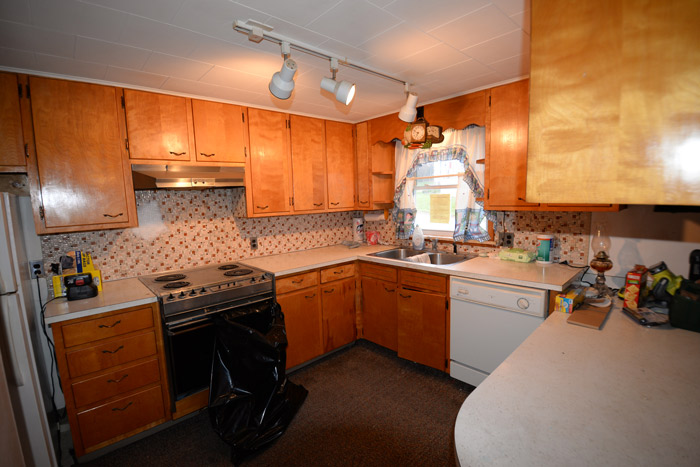
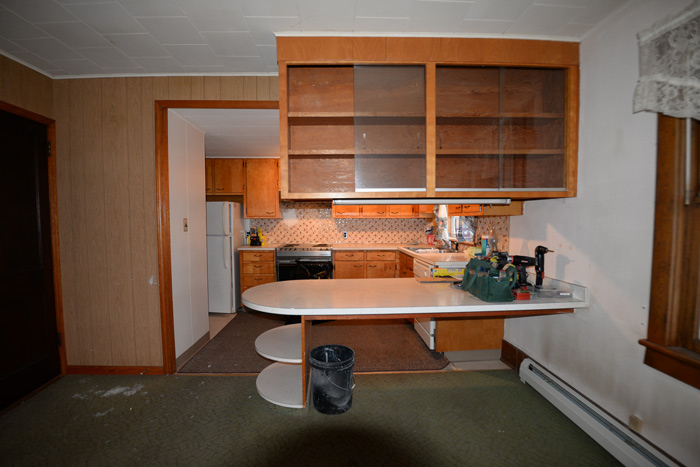
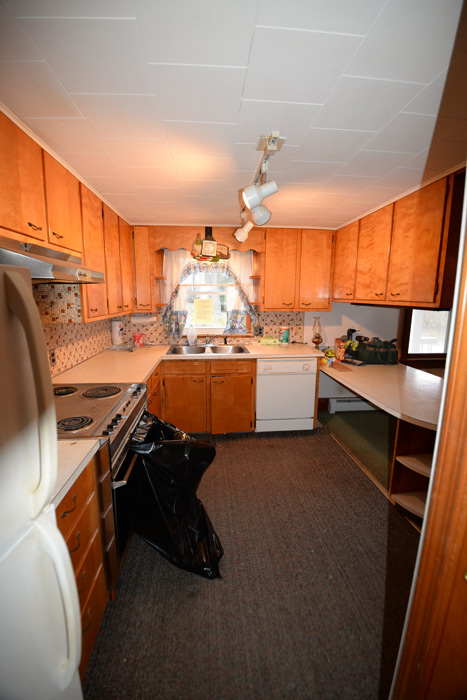
And here’s the part where it gets worse before it gets better:
Kitchen during


I am so proud of my “brilliant” idea to drop the upper cabinet and turn it into a peninsula. My husband and dad got to execute that “brilliance,” which I’m sure they were thrilled about. 😉 It was heavy! After the drop, we had to carefully patch the ceiling tiles where the upper cabinets were removed and add a toe kick to the “new” peninsula, raising it off the floor to proper height. What was supposed to be an easy project was maybe not so easy. But in the end it was perfection.
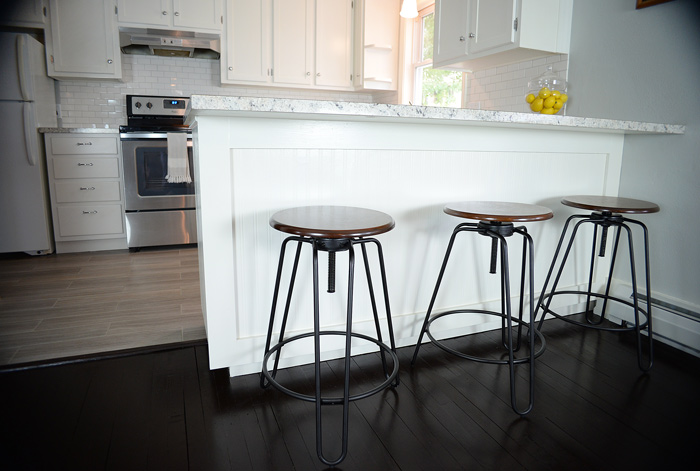
Check out the kitchen now!
Kitchen after


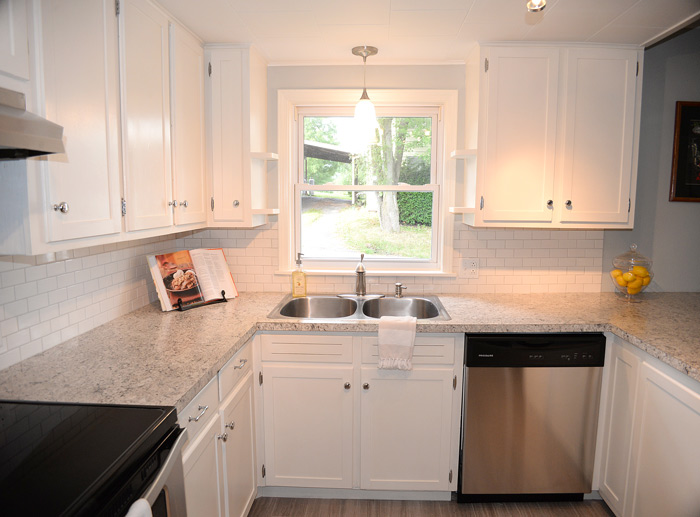
I’ll try to give you the CliffsNotes version of what went on here. I kept the original cabinets, doors and drawers, because they were in great shape. I refinished them using the Rust-Oleum® Cabinet Transformations® light kit in the Pure White (unglazed) color. I also kept the original sink, but I added a new faucet.
I started by scrubbing the doors and drawers with the deglosser that comes in the transformations kit. Then I added some lattice molding to the edge of the doors (not the drawers) to give the doors more of an upscale, modern feel. The lattice was attached with Liquid Nails® adhesive, then clamped until the glue dried. I used caulk around the edges of the lattice to fill any holes and cracks. After that dried, it was time to add paint.

I applied several coats of white paint in the kit using my HomeRight® Finish Max sprayer. I switched to the Finish Max Pro halfway through the job because it was such a large project and the pro seemed to handle the volume a little better.
After several coats of white paint, I sprayed on the protective topcoat that came in the kit. Done! Although this project turned out great, I will admit it was way more work than I anticipated, particularly the lattice part. #proceedwithcaution
I also replaced the cabinet hardware with shiny new chrome pieces I got at Lowe’s and online.
My dad installed new Formica brand laminate from Lowe’s to the countertops. I chose the Ouro Romano color.
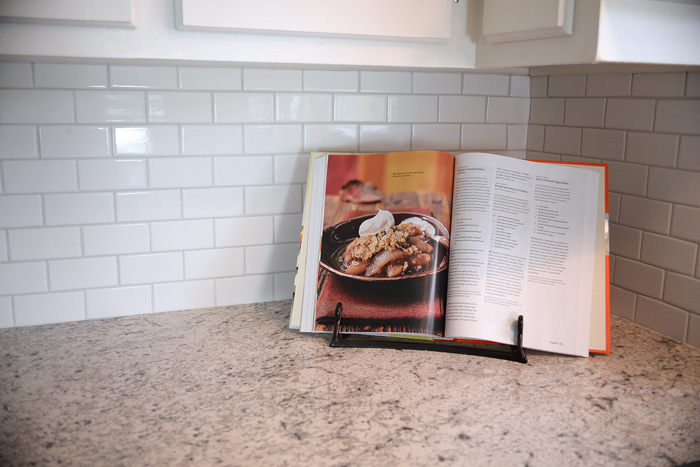
I demoed the old backsplash and replaced it with affordable (yet gorgeous!) subway tile, grouted with a light gray grout.
I purchased new stainless steel appliances (the white fridge came with the house) and added new, modern track lighting and a pendant light above the sink.
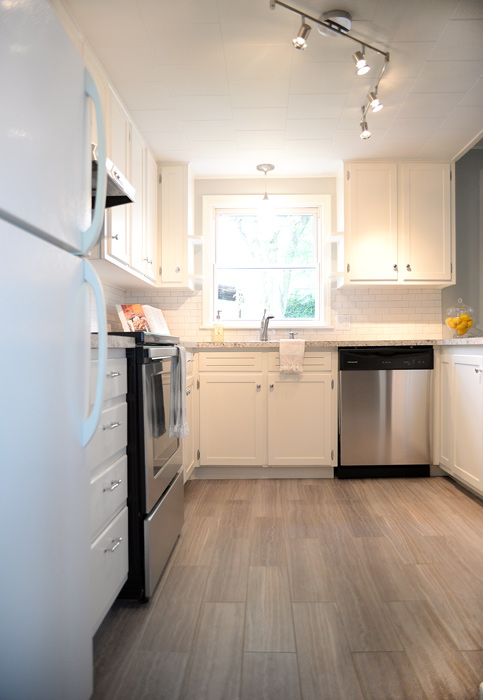
I installed groutable, luxury vinyl tile from Lowe’s in the Chateau color. I love this floor!
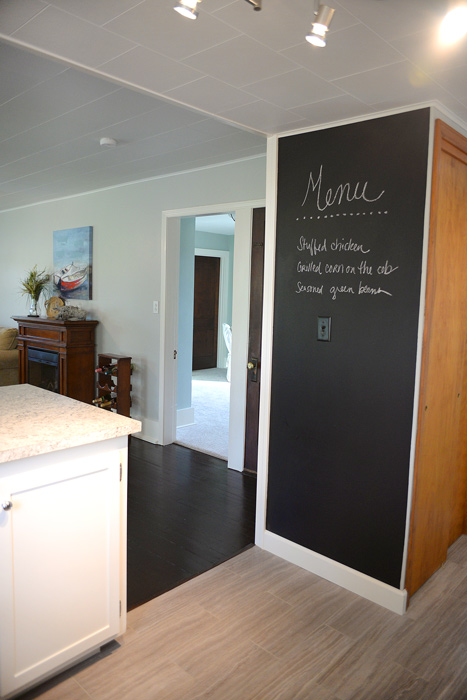
Of course, the whole room got fresh paint, including the ceiling. I added one accent wall in a chalkboard finish, which was a bit of a risk. But that chalkboard wall has been a huge hit with visitors and one of the first things they say they like about the house. So I guess it was a good choice. 🙂
Overall, I spent about $1,300 updating this kitchen (including appliances). What do you think of the transformation? I’d love to hear your feedback!


$1,300?!? Just wow!!
The lattice on the doors may have been a lot of work, but it makes them look so fresh and new. And the chalkboard was genius. I love the floor, too! The all white is very classic.
Thanks so much, Kim!
Simply amazing game Susan. Goder has certainly blessed you with some serious talent!????
The kitchen is beautiful!!! I want to see about buying new doors for our cabinets and then re-painting with the Rust-Oleum. You have given me hope.
Awesome, Patty. Thanks for the sweet feedback and best of luck with your cabinet project. 🙂
LOVE LOVE LOVE what you did! You are awesome!
Looks awesome!
You really have an eye for redesigning an old out-dated room and making it look amazing!
Wow! Thanks, babe. Your feedback is truly the stuff I value most. 🙂 Kisses …
Love it! Great job!
It all looks so clean and fresh! And much larger, since you dropped that upper cabinet. I love it. I would have painted the fridge with stainless steel paint to match the new appliances. Beautiful job!
Ditto…$1300?!?! Beautiful work. Also, what vision! Kudos to you, your husband and your Dad!
Thanks so much, Paulette. 🙂
Amazing! Dropping that cabinet and using it for the base was brilliant! I love the white tile backsplash. You should be very proud of your work. And I expect it was hard work. It made this kitchen awesome.
The transformation is incredible !! You took an old outdated kitchen and gave it new life!! It is beautiful! Great Job!!!
You did a great job! It’s a good feeling. I actually flipped my first house this summer and it was hard? But we bought it june 20th 7 days after it went on the market we got a full price offer and feel confident they r good buyets.
My sister and I did it we split the expenses and purchase price and the house had been repoed. By the VA. so we were able to buy it right!
It may be our first and last if we don’t find a really good buy. Our house was not old but had holes in the walls needed all new floors all new kitchen we painted the cabinets. Siding lots more we spent about $18 000 on everything.
I’m not sure there is as much money in flipping houses as the tv show people make?
Sorry for the long comment 🙂 good job 😉
It looks like you had a very successful first flip, June! I’m in the same boat with being hesitant to buy the next one without making sure it’s an incredibly good deal. I’m keeping my eyes peeled. 🙂
It really looks great! Such a transformation! I’m loving that floor. I think I need to get more information on it! Stunning.
Wonderful Job! Congrats on your buyer!
Hi Susan,
First time on your blog. I am amazed that you did so much for $1300.00. I don’t know even how to get started with the projects I need. Really nice work. Now, the other people in the pictures that are doing work. Surely, you have to pay them. Is the $1300.00 just for the kitchen redo? Still an incredible inexpensive fix that looks all high-end.
Thanks so much, Edwina. The $1300 was just for the kitchen. I spent around $30,000 for the entire house rehab.
Beautiful! We are in process of flipping our kitchen and dining room for resale as well, and I bought the same flooring you used after seeing how beautiful it looks all together! Did you grout the tile? And what color did you paint the adjoining room? It blends so well with the kitchen. TIA
I did grout the tile. I used Antique White mixed with Saddle Gray. I honestly forget the color of the adjoining room, but I looked up Valspar paint and “Stony Path” is a dead ringer; it may even be the exact color I chose. I can’t be sure.
Wow – awesome transformation! Thanks especially for sharing the links to the products used and exact names and colors:-)
Did you custom order toe laminate countertops or buy the ones already in stock? We are hoping to use the ouro romano color for our kitchen flip!
Neither. My dad used plywood and built a new top, then we ordered the laminate sheets (no countertop) and glued them down with contact cement.