
Garage renovation: From danger zone to ‘welcome home’ (plus a giveaway winner)
I recently shared with you the shameful condition of my garage, which I have not-so-affectionately dubbed The Great Garage Disaster. Since the work needed to renovate this space will be nothing short of epic, I decided to break down the project into phases (in order to save my sanity).
I am happy to report that phases 1 and 2 are officially finished! These phases involved organizing the junk and cleaning out one half of the garage, then painting that half plus the ceiling.
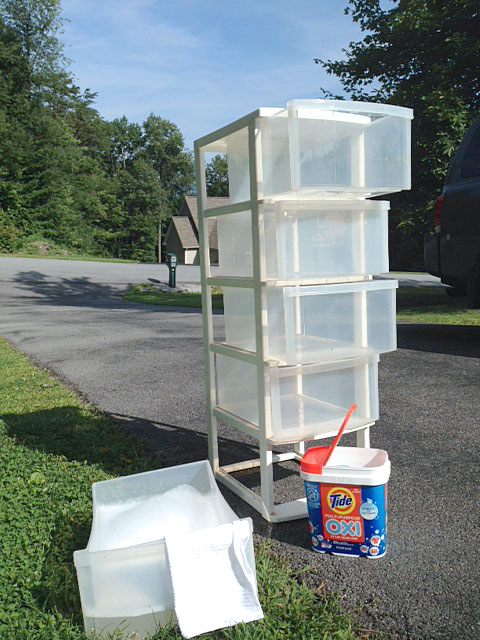
I started with this mess:

My first goal was to pitch, relocate and donate everything that didn’t belong in the space. Next, I used some yummy-smelling Tide OXI Multi-Purpose Stain Remover to clean the shoes and containers, and to give the foot mat a good scrub. I actually found room in the wall cabinets for the stuff that was in the plastic drawers, so I’m now using them inside the house to hold my craft supplies. Oh the treasures we find buried under our own rubble. 😉

After everything was cleared out and cleaned out, I wiped down the walls and patched the damaged spots. Check out my foreman on the left. He likes to closely supervise my work.

I painted the walls and ceiling with Behr Paint & Primer in One from Home Depot. The color is Granite Boulder and I chose the eggshell finish. This paint gives great coverage with just one coat. But you’ll need to be extra careful to avoid brush and roller marks.
While the paint dried, I came up with an easy solution to our shoe problem. Typically we kick off our shoes before we come into the house, so they end up strewn all over the garage floor. I had three baskets in the basement collecting dust, so I brought them up to serve as shoe corrals.
I wanted to designate shoe baskets for specific family members. So I cut out three pieces from a cardboard box, hole-punched them, and sprayed them with chalkboard paint.
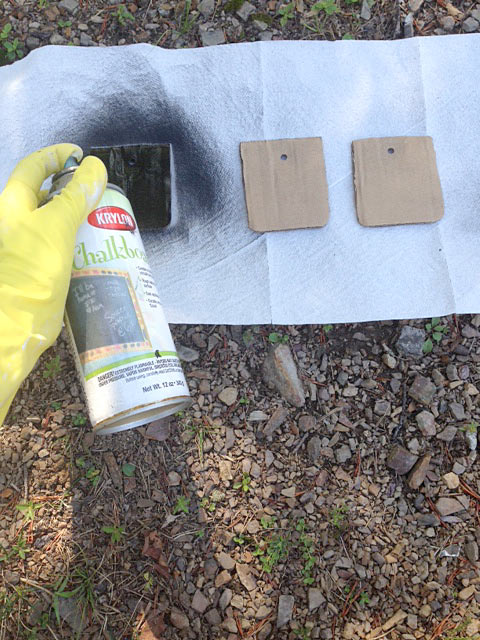
Then I labeled them with our names using a chalkboard marker. Finally, I tied them to each basket using some chevron-patterned ribbon.
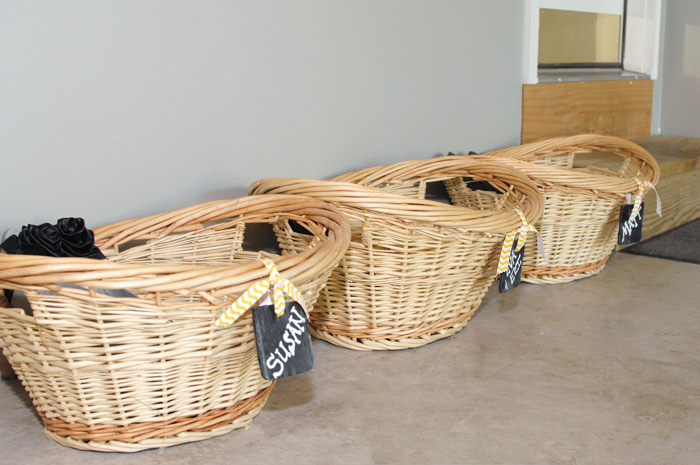
Hopefully this will help us keep our shoes at least semi-organized.
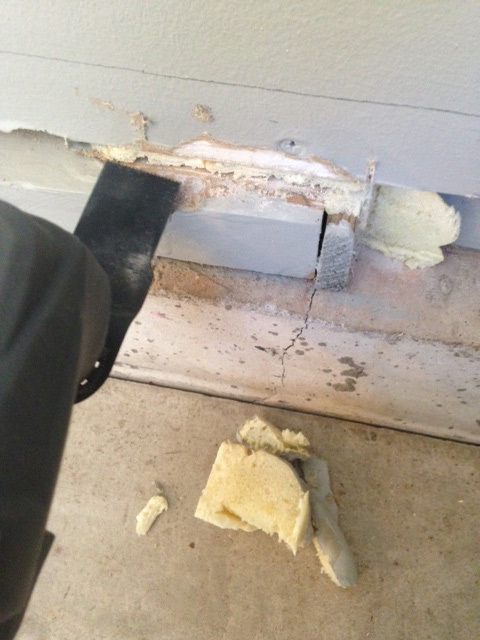
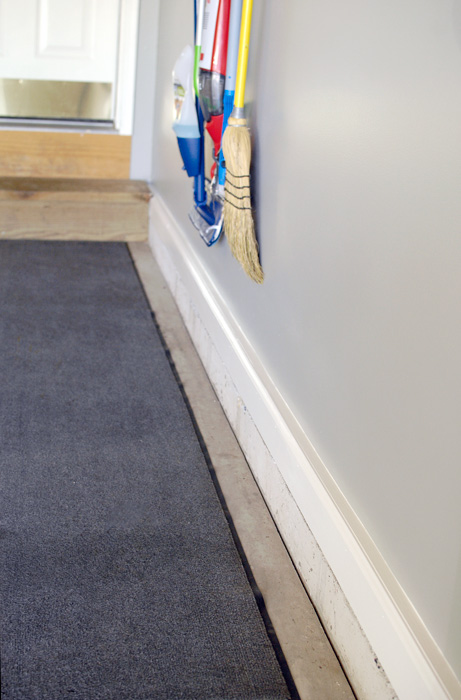
Another tricky problem I encountered was this ugly baseboard situation:

To hide the rough boards and foam, I needed to DIY my own baseboard solution. I started by priming white, then screwing into the wall 3/4″ wide furring strips. I placed them on the wall so that regular baseboard trim could be added to the front. The goal was to have the tops of both pieces line up flush with each other.

There were a few spots where I had to trim away some foam so the boards would fit properly. My Ryobi JobPlus™ multi-tool attachment cut the stuff like buttah.

After attaching the furring strips, I nailed baseboard to the front of the strips and painted everything in semi-gloss, white trim paint. Here is the result:
Now, for the final reveal of phases 1 and 2 of the garage renovation:

Check out the burlap wreath I made for the door:

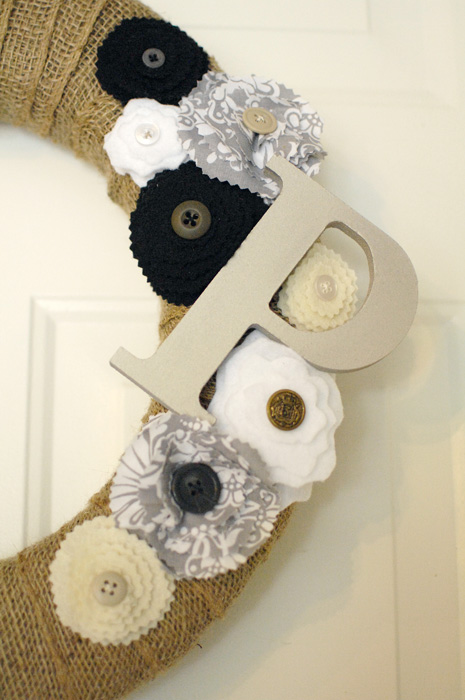
For a step-by-step tutorial on that project, click this link: Fast and easy DIY burlap wreath.
Have you tackled any major projects in your garage?
Before I go today, I wanted to announce the winner of the canning goodies from Ball brand. I posted the winner yesterday on Facebook and Twitter, but in case you missed it … congrats to Kari Cox! And thanks to all who entered.
Disclosure: This post is part of the Tide OXI Blogger Challenge. I received a gift card to Home Depot in order to purchase Tide OXI Multi-Purpose Stain Remover and other supplies needed to complete this project. As always, all opinions – and sweat equity – are my own.


Your garage looks great! Can you tell me how you made your Welcome Home sign on the door? Love it!! Thx
Sure, Lisa. You can find the tutorial here: http://livingrichonless.com/entry-door-makeover/.
I’m both impressed and inspired! The garage looks great.
Thanks, Sharon!