
How to make the easiest curtains ever
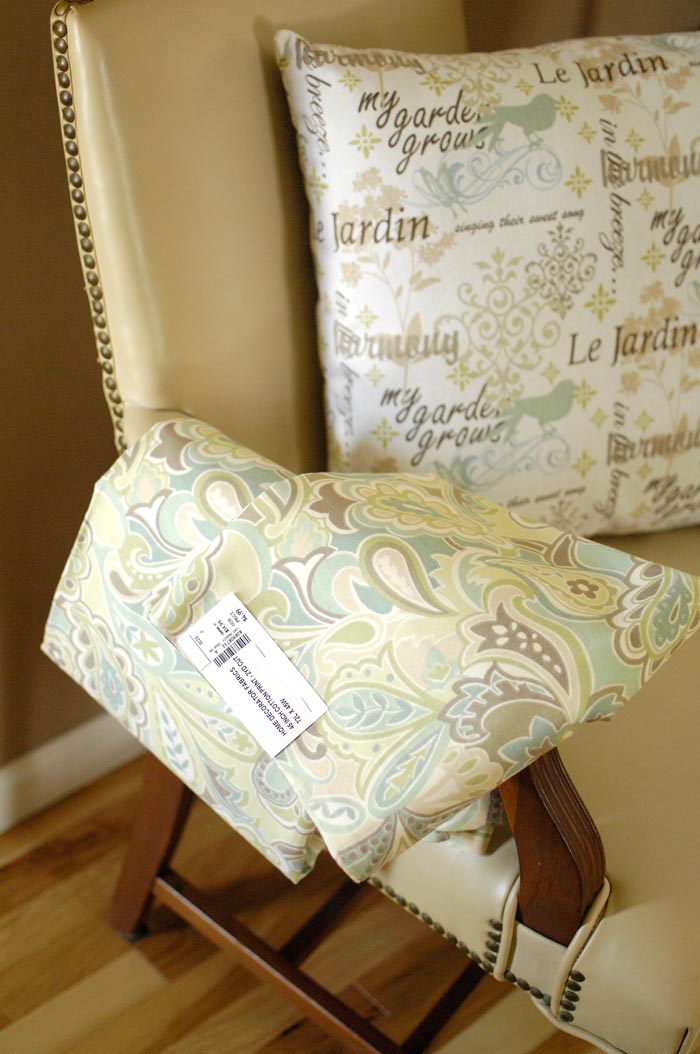
Perhaps you’ll recall the idiotic dancing that took place recently at Gabriel Brothers when I discovered the store had high-end decorator fabric on sale for less than $2.50 a yard. (If you live near a Gabe’s, run to the store right now to get some if you need it.)
I purchased four yards of fabric (totaling less than $10) with an idea for how to make easy curtains and pillows.
So one evening last week, as I was starting dinner, I thought, “Gee, this seems like a great time to make a valance for above the kitchen sink.” The hubs was at a meeting and the kids had disappeared somewhere temporarily (probably plotting their mutiny).
So between stirring mac and cheese and putting together peanut butter and jelly sandwiches, I created a spring-worthy kitchen valance. (I’ve never claimed to be sane, people.)
Of course, because I’m, well, me, this project had to be quick, easy and super cheap. I thought I’d share the details with you so you can whip up one, too (although I wouldn’t recommend doing it during dinner prep ;)).
The fabric at Gabe’s was sold in two-yard segments. I used one set of two yards and didn’t cut the fabric at all. I started by simply folding it in half with the inside facing out.
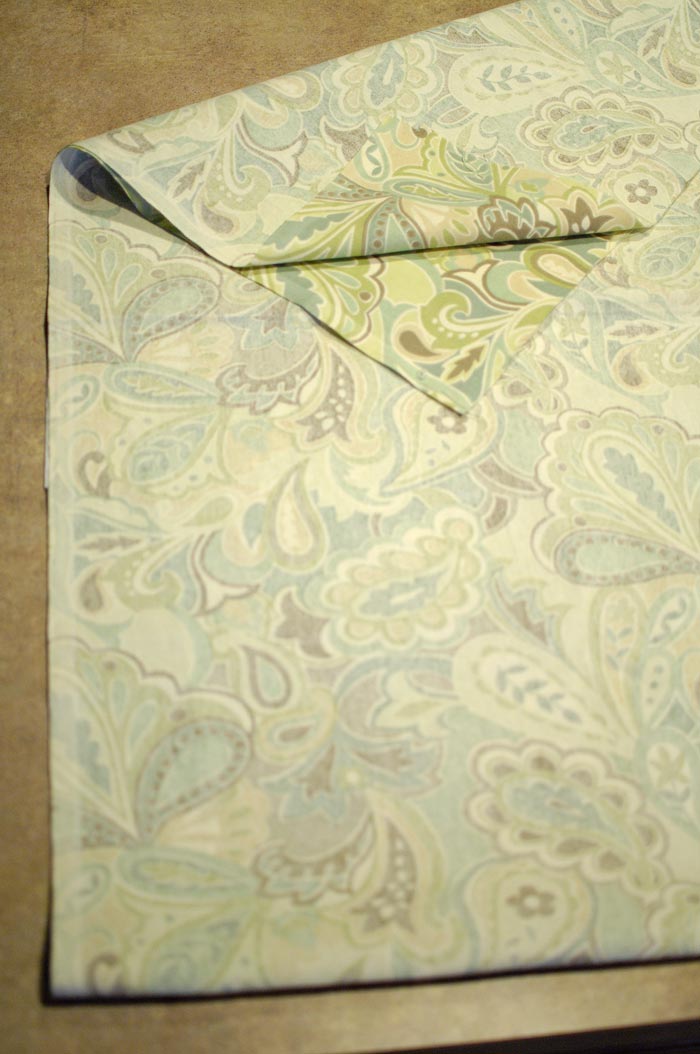
After I folded it in half perfectly, I used my sewing machine to hem just the bottom all the way across, but not the sides. (I eyeballed about a 3/4-inch hem; I didn’t mark it.)
 After I hemmed the bottom, I turned the “curtain” right side out again. This left me with a hemmed bottom and two openings at each side.

From there, I decided how wide I wanted my finished valance to be. Then I measured what my current width was.

I figured out how much I needed to reduce each side in order to arrive at my desired width.
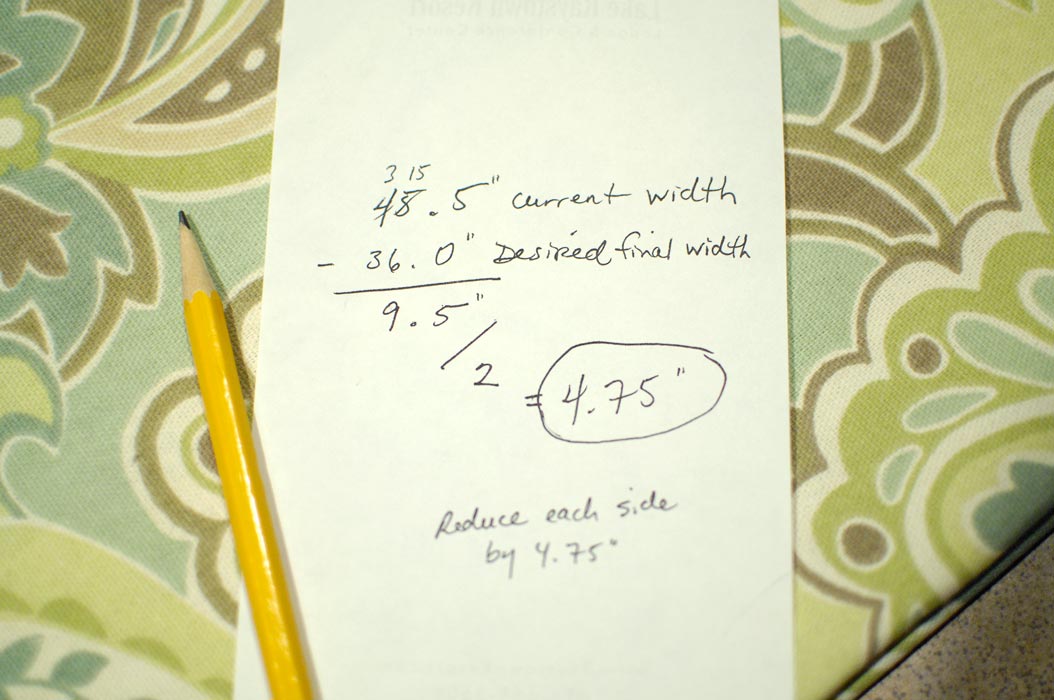
I needed to reduce each side by 4.75 inches. So I simply tucked the raw fabric in toward the middle on each side, until each fold was a total of 4.75 inches.

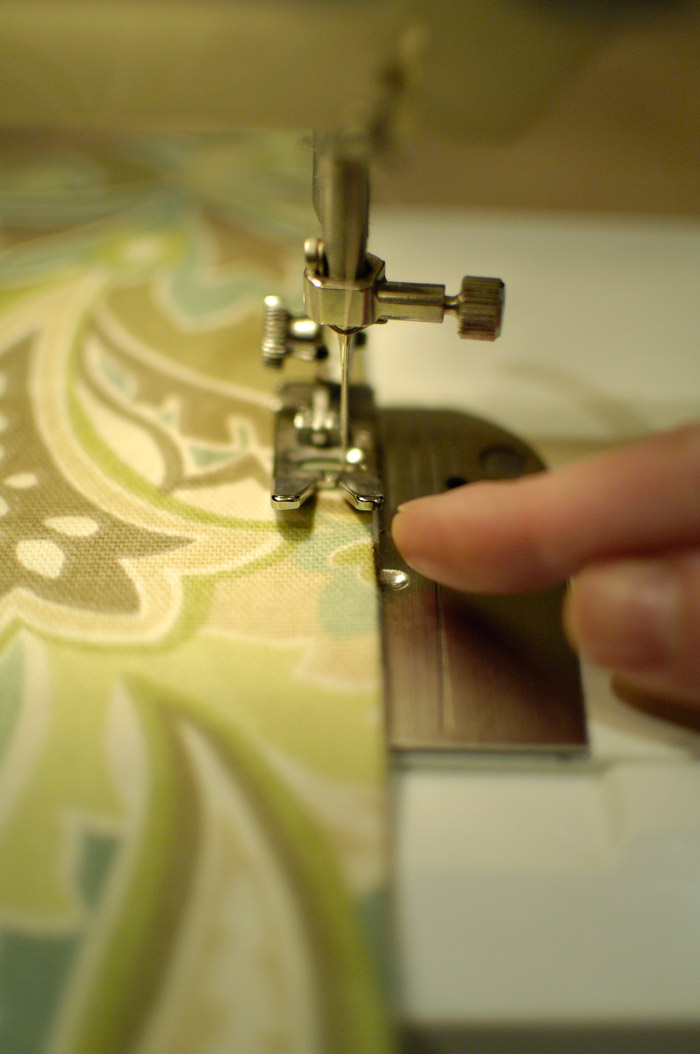
After I had both sides tucked in properly to give me my desired total valance width of 36 inches, I sewed a half-inch hem on both sides, leaving a 2-inch opening at the top for the curtain rod to slide through.

Again, I eyeballed this hem. One trick for keeping a hem straight: I line up the edge of the sewing machine presser foot with the edge of the fabric and use that as a guide as I sew.
After both sides were hemmed (with a 2-inch opening at the top), I ironed the whole “curtain.” I also created 2-inch accordion folds (starting from the bottom) and pressed them down with the iron, too.

Next, I hand-sewed my makeshift accordion folds together using a few quick stitches straight through on both sides, about 5 inches in.
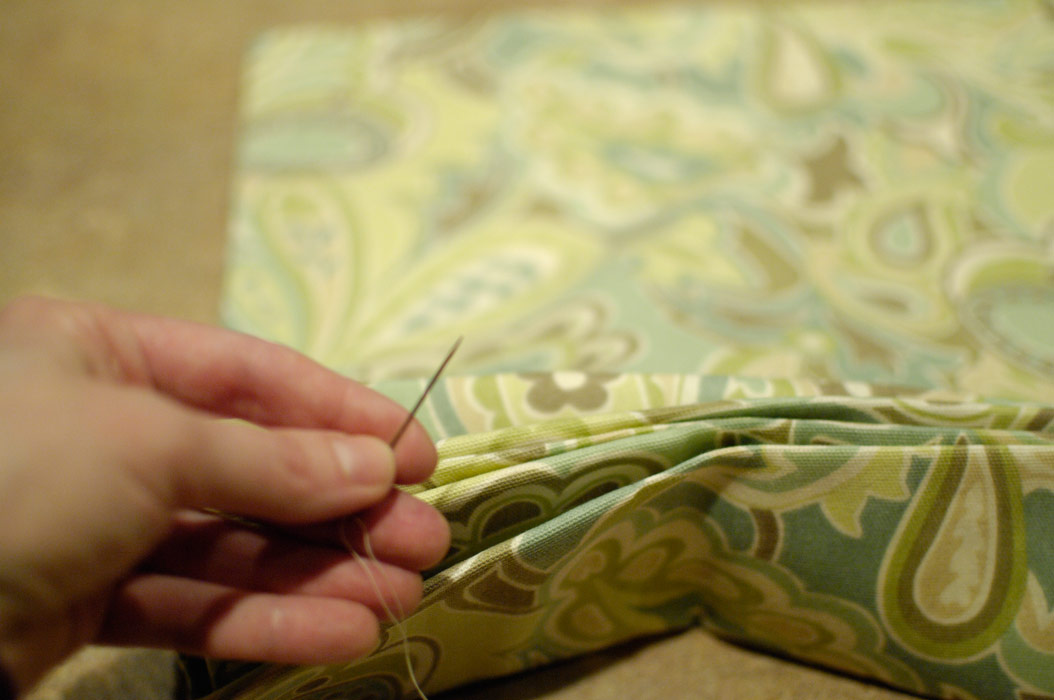

To make sure my accordion folds hung perfectly, I ironed on hem tape between the folds to keep them together.

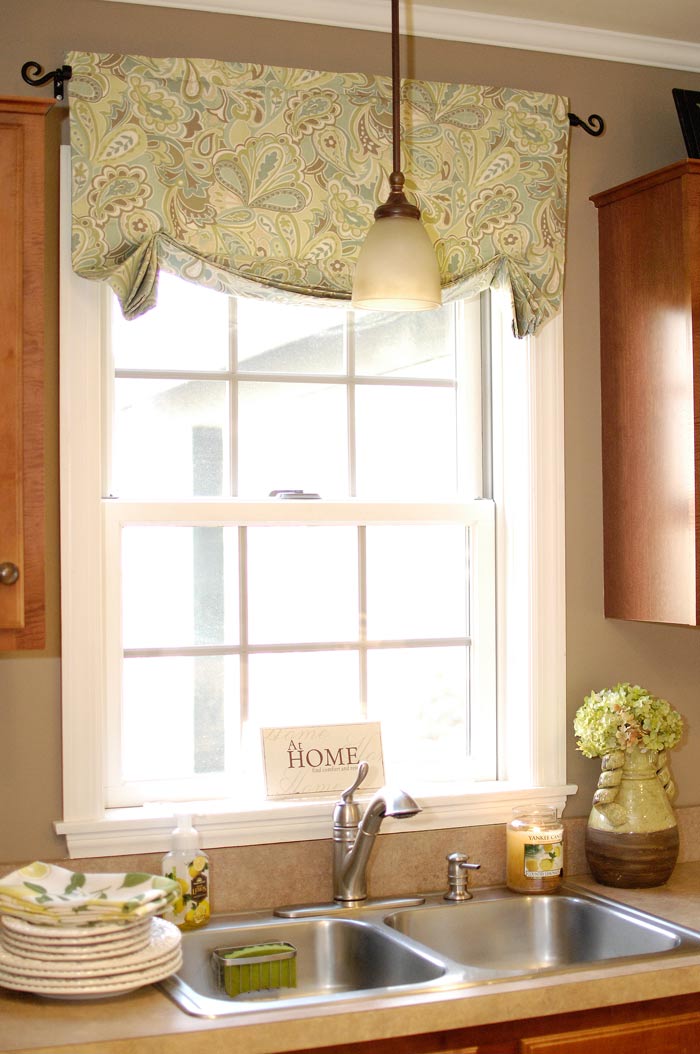
After that, my valance was done!
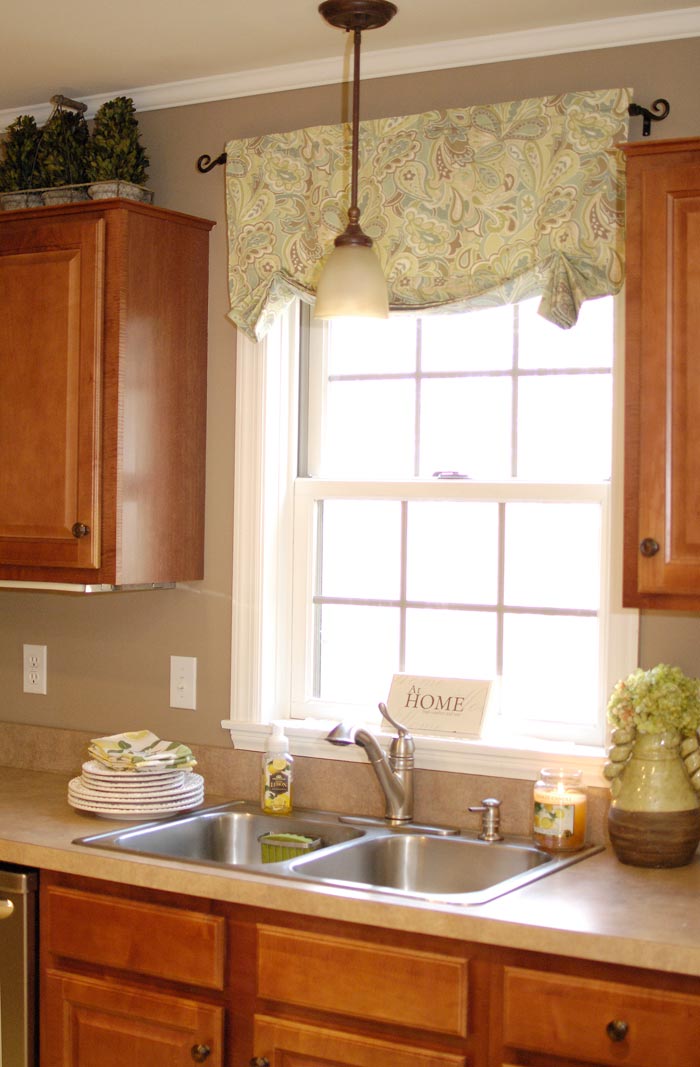
 You may notice I sewed an extra hem at the top because I wanted to raise the valance up a bit on the window. This step is optional, not mandatory.

Here’s a summary of the project steps:
- Fold fabric in half, with the inside facing out.
- Hem the bottom (not the sides) where the raw edges come together.
- Turn the “curtain” right side out.
- Fold in the raw edges on both sides until the valance reaches your desired width.
- Add a half-inch hem on each side, leaving about a 2-inch opening at the top for the rod pocket.
- Create your desired accordion folds (starting at the bottom) and iron them down.
- Hand-stitch the accordion folds together to your desired valance height.
- Iron on hem tape if necessary to make the folds hang perfectly.
- Install your valance and enjoy!
What do you think of this easy spring curtain? Have you found any great deals on fabric lately?
I’m linking this up to Craft Dictator, My Repurposed Life and Love of Family & Home.


I have been looking for an easy pattern to make valances (cheaply) for my Sunroom I have 8 windows and most of the valances I see are either too expensive or not long enough for my tall windows. This is a super idea Love it!
I’m so glad it was helpful to you, Lynn. Thanks for checking out the blog.
Lynn I have the same problem – 7 sets of tall windows with only shades right now. I wanted valances to soften the edges. This is perfect for me too!
Thank you Susan!
You’re very welcome, RuthAnne. 🙂
These are the cutest things. I have some gorgeous decorator fabric I have been wanting to make valances with. These are it! Thank you!
So glad you like it, Lisa! Thanks for stopping by.
This was such perfect timing! I was given some material that is perfect for my daughters new decor in her room, but haven’t figured out what to do with it. Window valances that are easy!?! Perfect!
Awesome, Amy. Best of luck with your project. Thanks for stopping by.
Thank you so much! This is a fantastic tutorial – I can’t wait to try it!!
I’m so glad it was helpful, Julie. Thanks for stopping by!
I really like the look of this valance, but I am a little confused about Step 2 and Step 5. Step 2, are the raw edges sewn together, or is each edge hemmed separately? Step 5 has me totally baffled. The sides are folded in to make the desired width, and then the raw edges are folded again to hem? Then, is the top folded down to make a rod pocket? Does this make the curtain itself rather bulky? Or do I have this messed up? Thanks!
Thanks for stopping by, April. I’m glad you like the valance. It is a little tricky for me to explain everything well, but let me try. 😉 In Step 2, the fabric is folded in half with the inside facing out. Then at the bottom, you sew TOGETHER the two raw edges and turn the whole thing inside out (which will now actually be right side out). At that point, the curtain is hemmed at the bottom but the sides are still open on both sides. Now, where each raw edge opening is, you’ll want to fold the fabric in toward the middle – kind of like if you were folding your pant legs under at the bottom to make them shorter. When you get each side folded under and the new width all the way across is what you want, you simply hem each side to close the side openings. REMEMBER to leave about 2 inches open at the top on both sides so your rod can slip through. You may have a pretty generous fold inside. Mine was nearly 5 inches on both sides. I didn’t notice any bulk, though. It is probably a little bit of a waste of fabric doing it this way, but mine was cheap and I was short on time.
What a GREAT idea! I’ve been wanting to do new window treatments in my dining room over a sheer since it faces the front of the house. I have this EXACT fabric and quite a bit of it as I changed my mind in the room I wanted to use it for. PERFECT! I certainly wish I had gotten mine for $2.50/yard!!!
Love this! Thanks for sharing.
I’m glad the post was helpful, Camille. Thanks for stopping by. 🙂
Love it, looks so nice! I, too, have this exact fabric and definitely paid more than $2.50. I’ve been to Gabe’s once and I don’t recall them having fabric. Will definitely be returning there soon!
Lisa, I’ve honestly never noticed the store selling fabric before, either. But I hope they continue to do it!
Love your new Spring valance Susan, and how funny that you use a metal tape measure instead of a seamstress tape measure. 🙂 love it!
gail
This is GREAT! I am currently involved in making roman shades and drapes for my new house. I wanted to make a valence for the kitchen and this will fit the bill perfectly. Thanks so much for the crystal clear directions.
You’re so welcome, Vicki. Thanks for stopping by. 🙂
Loved this and I HAVE this fabric. Will be so cute at my kitchen windows!!
Awesome, Glenda! Thanks for stopping by.
Thanks so much for the wonderful directions. I have made my own valances for years and can’t believe the time I have wasted after seeing your version. I am in need of making new ones and I will be doing it your way from now on. Thanks so much.
You are very welcome, Susan. Best of luck with your next sewing project.
Just made these curtains for my kitchen window. Ive had this fabric lying around waiting for the perfect tutorial. They turned out perfect!! My husband was so impressed by my skill, lol. The curtains add to my kitchen. Thank you for a great tutorial.
You are so very welcome, Sarah. I am so glad the project turned out well for you! Thanks so much for the feedback.
I am attempting to make these beautiful shades – envious of how lovely yours turned out…I need some help – when I hang mine, the sides are not straight, even though the side are straight without the sideways “accordion pleats” – they sag into the middle and the edge of the window can be seen …its driving me nuts ! – any suggestions?? THANK you!
Instead of bunching up all the fabric together and running one stitch on either side, consider adding a stitch at each fold. See my poorly attempted 😉 drawing here: http://livingrichonless.com/wp-content/uploads/2014/11/Curtain-tute.jpg. Hope this helps! It’s what I wish I would have done to mine the first time through, lol.
Sometimes that happens – but not for any good reason. I thought it might be because of my fabric weight, but nope. Lol. But I have found two ways to “fix” it: 1) I make the shade about 8-10″ wider than my window so that it drapes easily and won’t pull the fabric from the sides, and 2) I hot glue or just stash a yard stick or thin lathing strip on the back side between one of the folds (where it looks pleasing to the eye from the front) but NOTE: the stick only needs to be as wide as the area between where you sewed/glued the folds. HTH. 🙂
What a perfect idea! I was thinking ‘roman shade’, but that really was more covering than I wanted. So glad I stumbled on this, it looks great. So much cuter than the plain old valance I have been making over and over. Thank You!
You are so welcome, Karen. Thanks for stopping by.
I love this and was wondering if you would share the name of the fabric.
I’m so sorry, Ann. I picked this fabric up at a clearance warehouse, so there was no actual name on the tag. It simply said “home decorator fabric.”
Love this, any chance you recall the name of the fabric?
I love this valance. However, I have curtains that only frame the two sides of my window. They are not gathered much. I was looking for a valance to put over them. In your opinion do you think this valance would look good with a curtain behind?
That is a look that I’ve seen before. It’s not really my style right now, but if you like it, I say go for it! 🙂 Thanks for stopping by.
I have made curtains like this for nearly every house we have lived in. I originally found the pattern way back in college when I got a crafty hair one weekend when my hubby was out if town. Lol. Sometimes I make them only 18-34″ long like yours, and sometimes I makes them much longer, covering about 2/3 to 3/4 of a longer window. I’ve made them as ‘thin’ as 18″ wide and as much as 74″ wide (gosh I loathed that endow over the years!!). I did notice that you hang yours exactly opposite from how I did mine. See how your folds show at the bottom? I turn mine around and “hide” the folds. I don’t think it really matters, I just thought that was interesting. 😉 Great job!
I love this tutorial! However, when I constructed mine I have a feeling that my fabric is heavier weight than yours. When I press the pleats and stitch them, the center just billows out and it will not hold the pleats. Could you offer any suggestions to remedy this problem? Is it something that you’ve had trouble with before? My valence is 69 inches wide with a 17″ drop in the center. I did attempt To stitch the pleats in place But that just cause them To run parallel left to right. There was no drape in the center. Any suggestions would be greatly appreciated. I have a feeling I may have to start over with a lighter weight fabric, lol.
I can understand why this might happen. I had a small issue with mine doing this. I’m wondering if maybe adding a little stitch witch hemming tape (that stuff you iron onto fabric that keeps hems in place) might keep the pleats in place. Might be worth a shot.
quick question:
Love this look. BUT my windows are old and HUGE – 76″ wide. Fabric is 54″. Will it work as nicely if I add the extra width to either side OR will it end up droopy at the midsection and with visible trim at the outside?
Truly, you may have difficulty with it drooping the wider you span with the fabric. You may want to consider making your two pleats closer together to keep that issue at a minimum. Hope that makes sense. Best of luck with your project and thanks for stopping by. 🙂
Would this work with existing curtain panel? And how do I add the adhesive tape when they are sewn together? Sorry I am not a sewer at all.
Thanks
I believe it would work for an existing panel. The adhesive tape can be added to any fabric. The trick is to keep the layers fairly thin, though. If the fabric gets too bulky (multiple layers sewn together, for example), you may have trouble getting the adhesive to stick properly.
Lovely! I will give this a try on my kitchen windows-one window is narrow and the other one over the sink is wide like yours. Wish me luck!
I love the idea and am going to try it, but wondering about the step of adding the hem tape. Does it go between the folds from the stitch to the end of the valance, or does it go between the folds in the space from stitch to stitch (and if this is true, wouldn’t you need to do that prior to doing the stitch to hold the folds)? Or am I just totally confused?
Kari, probably the best way to do it would be to do the hem tape step before you do the stitches 5 inches in. I probably did it after the fact, which was a pain. So you aren’t confused, just thinking ahead. That should give you the best results. Thanks for stopping by. 🙂
Seems to me. Maybe less fabric could be used. So sides don’t have to be folded in so far to desired with. Beautiful but what’s your thoughts?
That’s a great point, Barb. 🙂
Instead of using 2 yards of decorator fabric,
could I use 1 yard of decorative fabric and 1 yard of of a liner fabric sewn together?
Thank you!
Yep, that would work. And likely be a good cost savings. 😉 Keep in mind you will see the under-side of the fabric in the folds. So make sure that’s the look you want.
I live in a community where only white or off white curtains can show from outside. I assume you could use liner for outside and the material for inside. Other than more sewing of the fabrics together, can this be done?
Sure!
Could you tell me how I would measure my window to get the right amount of fabric?
Honestly, I just kind of estimated/winged it. If you’re doing a small valance for one standard-sized kitchen window like mine, 2 yards should def do the trick.