Thrift store dresser redo with paint and stencils
A few years ago, I bought this wooden dresser at a thrift store for $80.
The picture was taken after I had already removed most of the drawers and started stripping off the finish. I have to admit, $80 is a little salty for me for a thrift store purchase. But this was a solid wood piece in great condition, made in the U.S.A, with dovetail drawer construction.
I knew it would work perfectly as a buffet in our dining room, so I immediately stained the piece to match my table and chairs.
 Fast forward to last week. I was feeling like that dresser was looking a bit dark and heavy in the room. So I decided to give it a second makeover, because I’m crazy like that. 😉
I scrubbed the dresser and drawers down with a deglosser first to help remove any wax residue and prepare the wood to take paint.
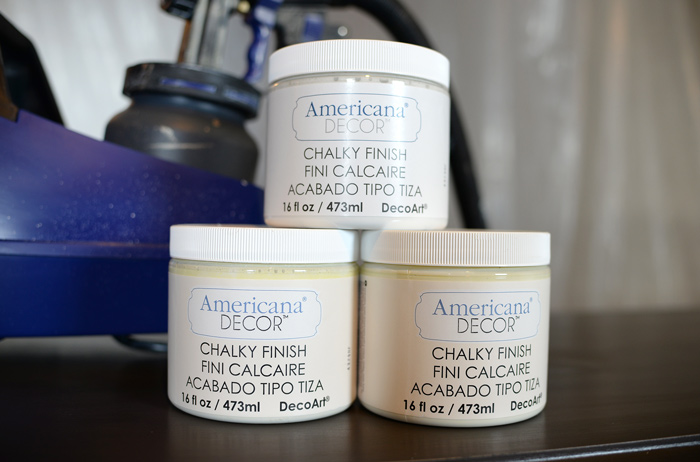
For this project, I used Americana® Decor™ Chalky Finish paint. I chose a mixture of two parts Lace to one part Everlasting.
I applied the paint using my HomeRight® Finish Max Pro Fine Finish Sprayer, giving everything two coats of the chalky finish paint.
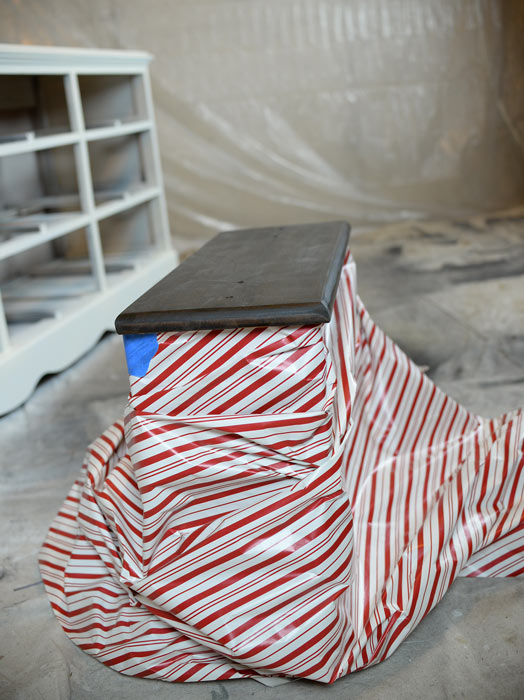
I’m notorious for grabbing whatever is within reach to help me out. 😉
After the paint dried, I used my orbital sander to smooth out any rough spots and give the edges a distressed look.
In addition to not requiring primer, I’m impressed with how beautifully this chalky finish paint sands down. The finish on this piece was as smooth as glass when I was done.
The next step took my distressed dresser from a furniture piece to a work of art.
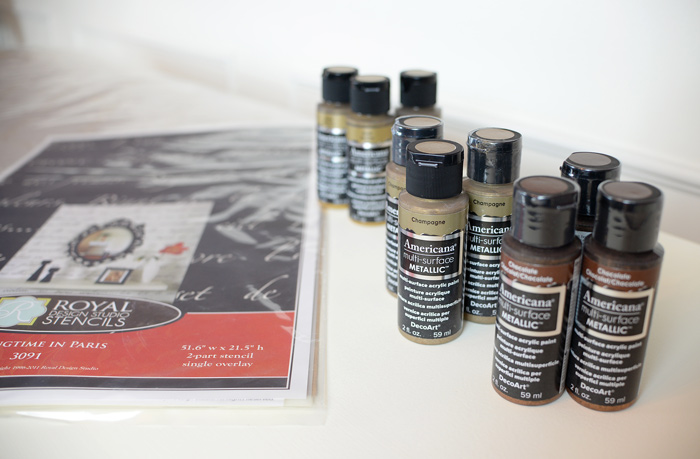
I mixed up equal parts of Americana Multi-Surface Metallic™ paint colors in Chocolate, Champagne and Gold. (Americana Multi-Surface paint is available at Michaels.)
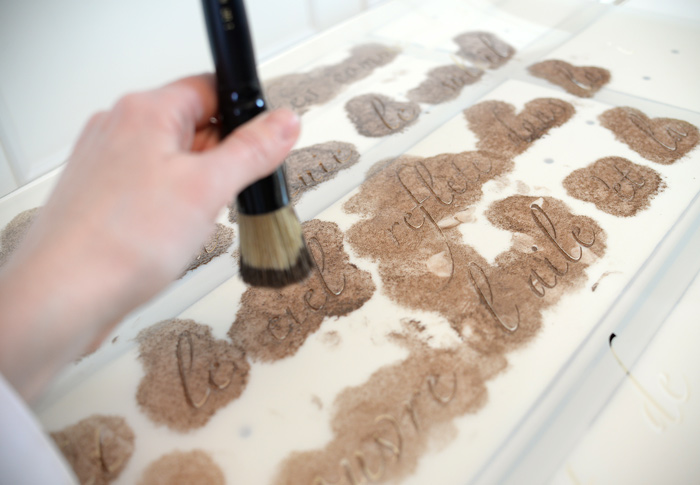
I chose the Royal Design Studio Springtime in Paris stencil, placing the dresser on its back so I could easily lay out the stencil pattern and apply the multi-surface paint. This paint will adhere directly to most surfaces and is self-sealing.
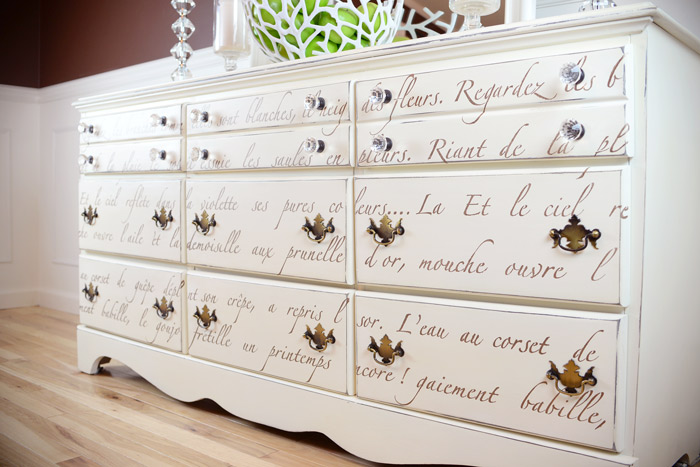
Here’s a look at the piece after it was stenciled.
I applied a coat of clear creme wax to protect the finish and waited for that to dry.
Finally, I buffed the piece with a soft cloth and reattached all the hardware. Done!
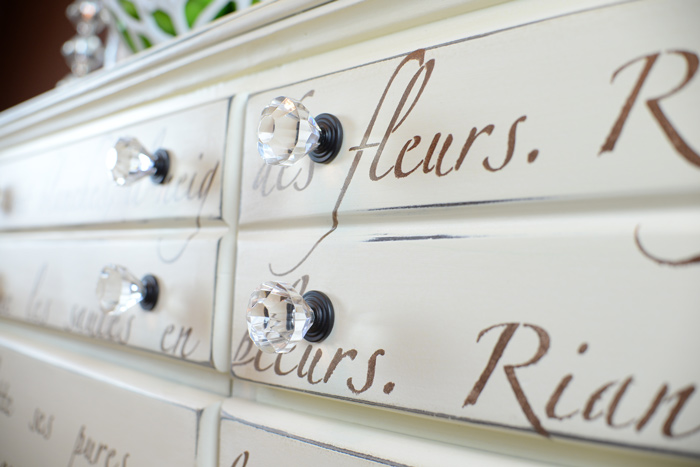
I think this “‘new” buffet helps to brighten up the dining room a lot. What do you think?
Don’t forget to visit the DecoArt® Multi-Surface website for more crafting ideas and inspiration.
Special thanks to the folks at DecoArt for sponsoring this post and providing the paint needed to complete this project. As always, all opinions – and sweat equity – are 100 percent mine.












Just beautiful and so much lighter feeling.
WOW, that is beautiful!!!! Nice job!!!
Thanks so much, Lucy. 🙂
Absolutely gorgeous! And you make it look so easy.
Thanks for the kind feedback, Jules, and for stopping by. 🙂
Two thumbs up! Really updated the piece.
Fantastic! I love it. I have a piece in the garage that could use this kind of love.
Just wow!! I love those metallic paints and this is a great use of them.
I love the stencil! I did the same thing to my yellowing oak dining room table because at this stage in my life I really didn’t want to $pend money on a new table, buffet etc., not when I can apply it to a new sewing machine!
Thanks for the feedback, Linda. And that sewing machine was a smart purchase. 😉
Thank you for sharing a wonderful piece. This is fantastic, I also have a tendency of changing things if I don’t think they match correctly or live their second lives up to their potential. Keep on painting!
Yes, Marianne. I have a tendency to want to match everything perfectly, too. But I’m learning over time that sometimes the things that work well in a room and give it that upscale, pro look actually don’t match at all.
Love this piece! Can you tell me a couple things though? What made you decide to use the original (?) hardware on the lower drawer sets? Did you paint the interior of the drawers also? And ……..lastly, when first prepping a piece to take paint, does it NEED to be sanded down, or does using a deglosser prep the piece enough?
Thanks!
What made me use the original hardware? The fact that I didn’t want to pay to buy new hardware. 🙂 Someday, I may upgrade, although my husband says he likes the old hardware on it. I did upgrade the top knobs to glass. I did that when I accomplished the first redo. I did not paint the interior of the drawers, hence the Christmas wrapping paper photo showing how I “taped off” the rest of the drawer so it wouldn’t get paint on it. Using a deglosser prepped the piece enough, no primer required. Actually, chalky finish paint doesn’t require even a deglosser. But I had years of wax buildup on the piece and I just felt better getting that off first. Thanks for the feedback and for stopping by. 🙂
Wonderful! Two totally different looks and such a beautiful job. Personally, I really love the first one with the dark finish and a soft contemporary look. Thank you for sharing as it is much appreciated!
A homerun hit right out of the park!
So, Susan, what do the French words mean? I don’t know French only Spanish and English. If I did it, I would do English words such as “faith, love, kindness, goodness, patience, gentleness, self-control, thankfulness, gratitude, prayer, etc.” I do love the white over the dark look. Very nice!
Here is the French poem translated:
Look at the boughs,
How white they are,
It’s snowing flowers!
Scoffing at the rain,
The sun dries
The weepy willow.
And the sky reflects
In the violets
It’s pure colors,
The fly opens its wings
And the dragonfly
With the golden pupils,
And the wasp-like corset,
Unfolding its silky wings,
Has resumed its flight.
The water happily babbles,
The tiny fish wriggles
It’s Springtime again!
Love it! Want to try that on a piece.
BTW, one of your handles is upside down. 🙂
Thanks for bringing that to my attention, Jan. Must have gotten mixed up in the DIY fog. 😉
Oh my! Awesomeness! What a refreshing change! I have a dresser I was thinking about painting black, but I love this!
Thanks, Peggy!
I love this! I agree the dresser was a little too dark..I love the brown hardware against the creme color..I have in my bedroom, it seems, everything is wood finish..even paneling!! I saw this project and thought, what would be a good match to break it up..hmmmm. Now you got me thinking and I just love, love the writing on it…just seals the deal..Since I have a dresser that is coated with stain and shiny, was wondering would the same process apply? Also..is the name on the chalky paints like: lace and the other one on top label of jars of paint? I didn’t see the name on the front?..Great Job! Was wondering if the sides were the color of the light brown in your floor if that would break up the cream against the white? I wish I had a lot of pics to choose from because with this bedroom of nothing but wood, pretty wood, I really don’t know where to start..lol 🙂
Since your dresser has a gloss finish, I would recommend using a deglosser on it first or roughing it up a bit with some sandpaper to help the paint grip really well. Although … this chalky finish paint claims you don’t need to use a primer on your piece first before you apply it; it grips really well to just about any surface. I just like to take the extra step to prep a piece well so the end result is a more durable finish – especially with something like a dresser that gets a lot of use. The name of the chalky finish paint is listed on the top of the jar. The brighter white color is called Everlasting and the off-white color with a hint of yellow is called Lace. Also, I have the stencil on hand, so if you ever want to borrow it, let me know and I’d be happy to lend it to you. 🙂
What a beautiful transformation.! Could you tell me where you got the stencil from? Thanks
Sure, Lisa. It’s from Royal Design Studio and it’s the Springtime in Paris stencil. Thanks for stopping by. 🙂
I love this, so beautiful. I love the french stencil, I always stencil my pieces that is my favorite part. I am not a blogger yet but maybe one of these days. All of my work is for me and when I get the chance I love to do special pieces for my family. This is one of the most beautiful pieces I have seen.
Thanks so much for the kind feedback, Kathy. 🙂
Just beautiful! I liked the dark one also. Did you use stain or paint for the black one? Also, do you have to thin your chalk pain to use in the sprayer? I use the Americana Chalk Paint also and it’s a thicker paint so I was wondering about the thinning. thanks!
This is beautiful! I also love the bowl you have on top.
one drawer pull is upside down! But I love , love, love the finshed look! So light and def upscale. I want to go out and find a dresser to save!
C’est magnifique! LOL that’s the limit of my French language skills! But I do love this piece so much! And I prefer it over the dark finish, although I’m sure the dark finish fit your purpose at that time. The poem is lovely. I am enjoying your blog and maybe I’ll even get up the nerve to try some DIY stuff someday. You are such an inspiration!
Thanks for the kind words, Kitty! Best of luck on trying out some DIY projects. You can do it! 🙂
I love it. The only thing I would change is the American eagle hardware. I like the glass on the upper drawers. The rest is beautiful….beautiful job….