
Firewood turned DIY wall art
Today I wanted to do a recap of a recent DIY wall art project I shared on my friend, Gail’s, blog at My Repurposed Life. Gail is a sweetheart and fellow DIYer that I met at Haven two years ago. She’s recovering from surgery and needs some good, old-fashioned rest and relaxation right now.
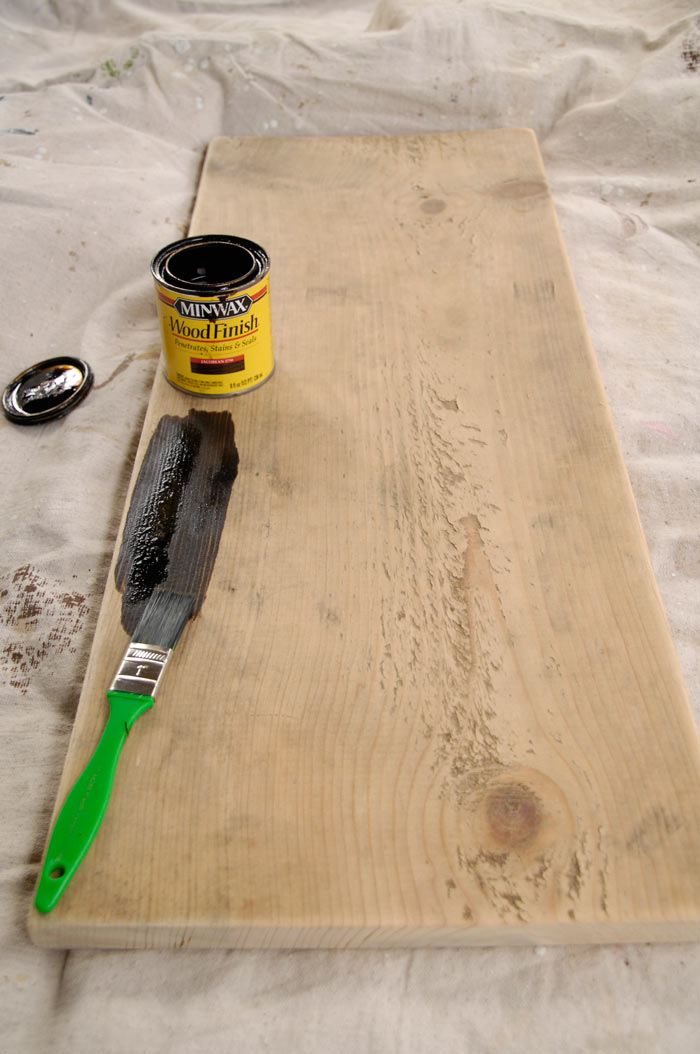
It all started with this hunk of board I discovered on our firewood pile a few weeks ago.

My husband said he found it under a pile of leaves and assumed it was junk. Silly husband. 😉
It didn’t seem to be too warped, so I rescued it. I trimmed the top and bottom on the miter saw to make the length 30 1/2 inches. (I kept the width at 11 1/2 inches and the depth at about 3/4 of an inch.)
I sanded all four sides and the edges and corners with my orbital sander. Then I brushed on a coat of Minwax stain in Jacobean.

While the stain was drying, I created some word art I wanted to stick on the front of it. I used Adobe Photoshop to piece together a collage of words using various fonts. (I’m sure you could create something similar using PicMonkey or Gimp.)
I made the image size 20 inches wide by 30 inches long – the largest poster size available through the Walmart photo lab (for same-day pickup). Because my wood piece was only 11 1/2 inches wide, I made sure the word art was no wider than 11 inches. (You’ll see why later.)
 I’m sure I got a few strange looks from the Walmart photo lab employees considering I had chunks of white space on both sides of my poster. But I just carefully trimmed them off at home.
 Next I mounted the word art onto my stained board using Mod Podge (matte finish). This is the part where I held my breath, because it looked like I was ruining everything!

 I applied Mod Podge to the entire top of the photo, too. Luckily, it dried clear. I did make sure to use even strokes with my paintbrush so the texture of the glue was not too visible.
To hang the piece on the wall, I used Command™ Large Picture Hanging Strips.

Here’s the final result:

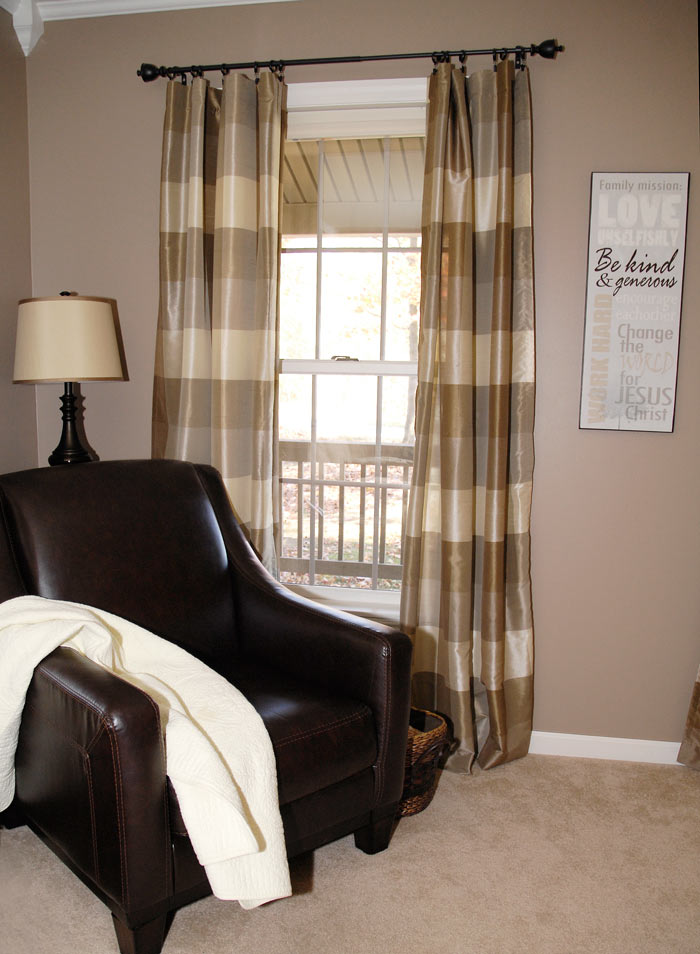 You’ll notice I left about a quarter inch of the board visible on all four sides in front. I felt this gave it a more finished look. I love that you can see the wood grain on the sides.
 So there you have it … a rescued piece of firewood transformed into an inspirational family mission statement.
Have you rescued any wood lately?
I’m linking this up to Thrifty Decor Chick, Home Stories A to Z, Fluster Buster and Not Just a Housewife.


It turned out awesome! Thanks for sharing.
Thanks so much for stopping by, Joani!
LOVE IT!!!!!!!!!!!!!!
Love, love, love!
Beautiful! I love it!
Hi i love this! i’m wondering what program to use to actually make the poster? thanks
I used Adobe Photoshop, but you could easily do the same thing in Gimp or PicMonkey.
Love the result – looks professional! And you made it look easy.
That’s sweet, Dani. Thanks for stopping by!
That board after you stained it was lovely.I don’t know if I could have covered it all up like you did? But it’s nice.
So resourceful! I think I know what to do with some firewood that I sometimes found at the backyard. Thanks for this great idea.
Your salvaged wood turned out beautiful. I tend to try to find new uses for everything I come across. I have a piece of art now over my bed that was a street sign at one time, wooden handles are now garden markers in the grand children’s garden beds.
Beautiful. I love it.
Love this and love the saying. I don’t have Photoshop. Is there another way to do this.? Thanks
Sure. You could use Gimp, a free photo editing program. I really like that one and it is very similar to Photoshop. Or probably PicMonkey would work, too. You could pretty much create this in any photo-editing software.
Love everything about it!